import numpy as np
import matplotlib.mlab as mlab
import matplotlib.pyplot as plt
def demo1():
    mu ,sigma = 0, 1
    sampleNo = 1000
    np.random.seed(0)
    s = np.random.normal(mu, sigma, sampleNo)
    plt.hist(s, bins=100, normed=True)
    plt.show()
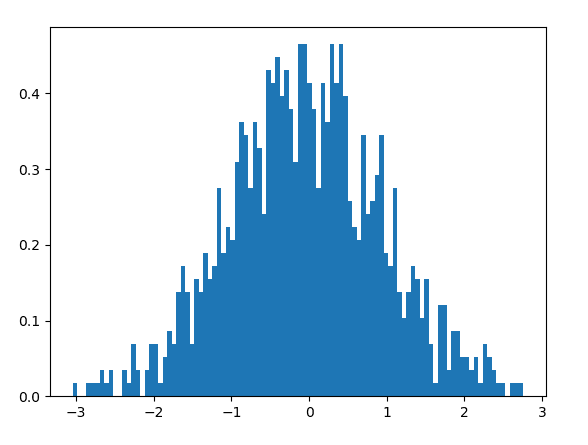
上面是一个标准正态分布的直方图。最后输出的图像为:

很多同学心里会有疑惑:这个图像看上去虽然是有点奇怪,虽然形状有点像正态分布,但是差得还比较多嘛,不能算是严格意义上的正态分布。
 为什么会有这种情况出现呢?其实原因很简单,代码中我们设定的smapleno = 1000。这个数量并不是很大,所以整个图像看起来分布并不是很规则,只是有大致的正态分布的趋势。如果我们将这个参数加大,相当于增加样本数量,那么整个图像就会更加接近正态分布的形状。跟抛硬币的原理一致,抛的次数越多,正面与反面的出现概率更接近50%。
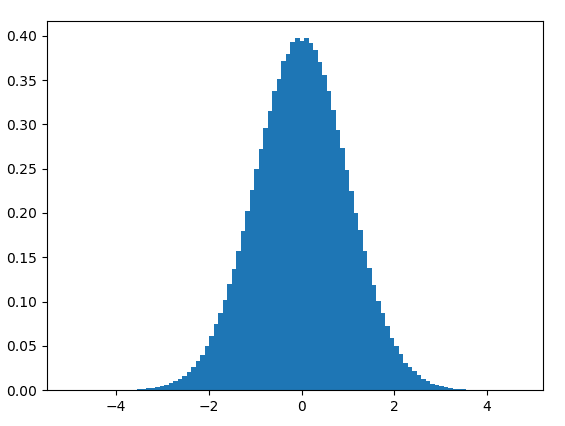
 如果我们将sampleno设置为1000000,分布图像如下。

下面这个图像是不是看起来就漂亮多了!
##3.画直方图与概率分布曲线
import numpy as np
import matplotlib.mlab as mlab
import matplotlib.pyplot as plt
def demo2():
    mu, sigma , num_bins = 0, 1, 50
    x = mu + sigma * np.random.randn(1000000)
    # 正态分布的数据
    n, bins, patches = plt.hist(x, num_bins, normed=True, facecolor = 'blue', alpha = 0.5)
    # 拟合曲线
    y = mlab.normpdf(bins, mu, sigma)
    plt.plot(bins, y, 'r--')
    plt.xlabel('Expectation')
    plt.ylabel('Probability')
    plt.title('histogram of normal distribution: $\mu = 0$, $\sigma=1$')
    plt.subplots_adjust(left = 0.15)
    plt.show()
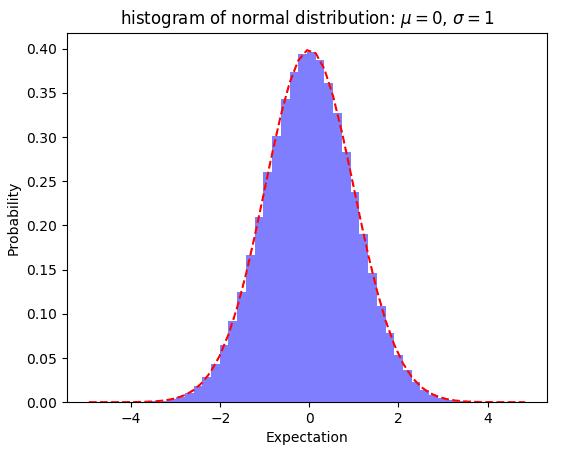
最后得到的图像为:

                    1.正态分布简介正态分布(normal distribtution)又叫做高斯分布(Gaussian distribution),是一个非常重要也非常常见的连续概率分布。正态分布大家也都非常熟悉,下面做一些简单的介绍。 假设随机变量X服从一个位置参数为\mu、尺度参数为\sigma的正态分布,则可以记为: {\displaystyle X\sim N(\mu ,\sigma ^{2})}
				画频次直方图需要先用numpy生成服从正态分布的数据,然后用matplotlib画图。其中seaborn也是python的一个数据可视化的库。用seaborn画图比matplotlib更方便和好看点,其底层也是matplotlib.
import numpy as np
from numpy.linalg import cholesky
import matplotlib.pyplot as ...
				要绘制二元正态分布密度函数图像,可以使用Python中的matplotlib库和numpy库。下面是一个绘制二元正态分布密度函数图像的例子:
```python
import numpy as np
import matplotlib.pyplot as plt
from scipy.stats import multivariate_normal
# 定义均值和协方差矩阵
mean = [0, 0]
cov = [[1, 0.5], [0.5, 1]]
# 创建网格
x, y = np.mgrid[-3:3:.1, -3:3:.1]
pos = np.dstack((x, y))
# 计算二元正态分布密度函数值
rv = multivariate_normal(mean, cov)
z = rv.pdf(pos)
# 绘制图像
fig = plt.figure()
ax = fig.add_subplot(111, projection='3d')
ax.plot_surface(x, y, z, cmap='viridis')
ax.set_xlabel('X')
ax.set_ylabel('Y')
ax.set_zlabel('PDF')
plt.show()
在上面的代码中,我们首先定义了二元正态分布的均值和协方差矩阵,然后创建了一个网格,计算二元正态分布密度函数值,最后用matplotlib库中的plot_surface函数绘制了一个三维图像。
代码中还使用了projection='3d'来指定绘制三维图像,cmap='viridis'来指定颜色映射。最后用set_xlabel、set_ylabel和set_zlabel来设置坐标轴标签。
运行以上代码,就可以得到一个二元正态分布密度函数的图像。


