

【愚公系列】2024年01月 GDI+绘图专题 DrawImage
原创
🏆 作者简介,愚公搬代码 🏆《头衔》:华为云特约编辑,华为云云享专家,华为开发者专家,华为产品云测专家,CSDN博客专家,阿里云专家博主,腾讯云优秀博主,掘金优秀博主,51CTO博客专家等。 🏆《近期荣誉》:2022年CSDN博客之星TOP2,2022年华为云十佳博主等。
🏆《博客内容》:.NET、Java、Python、Go、Node、前端、IOS、Android、鸿蒙、Linux、物联网、网络安全、大数据、人工智能、U3D游戏、小程序等相关领域知识。
🏆🎉欢迎 👍点赞✍评论⭐收藏
🚀前言
在WinForm中,可以使用Graphics类的DrawImage方法来绘制图像。具体步骤如下:
- 准备好要绘制的图片,通常可以使用Image类来加载图片。
- 创建一个Graphics对象,指定要绘制的目标画布。
- 调用Graphics对象的DrawImage方法,传入要绘制的图片和位置信息,即可在指定位置绘制图片。
以下是示例代码:
public partial class Form1 : Form
    private Image image;  // 要绘制的图片
    public Form1()
        InitializeComponent();
        // 加载图片
        image = Image.FromFile("image.jpg");
    private void Form1_Paint(object sender, PaintEventArgs e)
        // 创建Graphics对象
        Graphics g = e.Graphics;
        // 绘制图片,位置为(10, 10)
        g.DrawImage(image, 10, 10);
}
在上述示例中,我们通过重写Form的Paint事件,在窗体加载时绘制图片。当然,也可以在其他事件中绘制图片,比如Button的Click事件。
🚀一、DrawImage
🔎1.显示图像
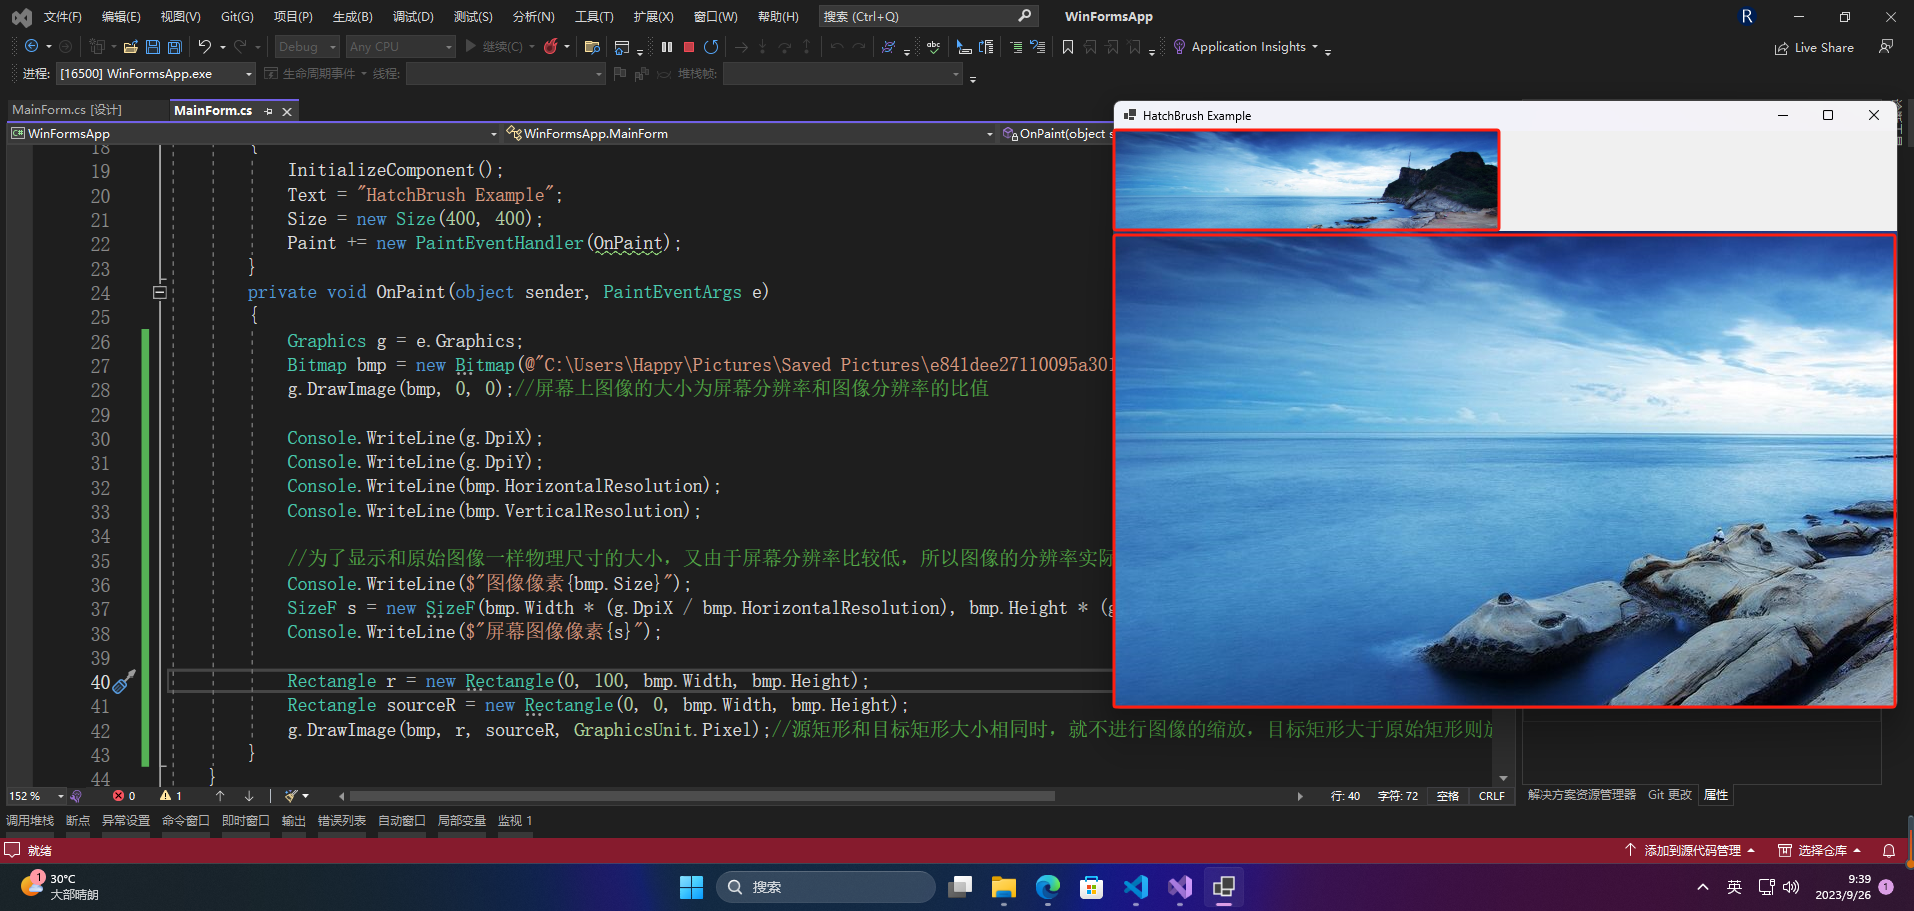
使用DrawImage方法显示图像需要先创建一个Bitmap对象,并将其传递给Graphics对象的DrawImage方法。以下是演示如何在WinForms中使用DrawImage方法显示图像的代码示例:
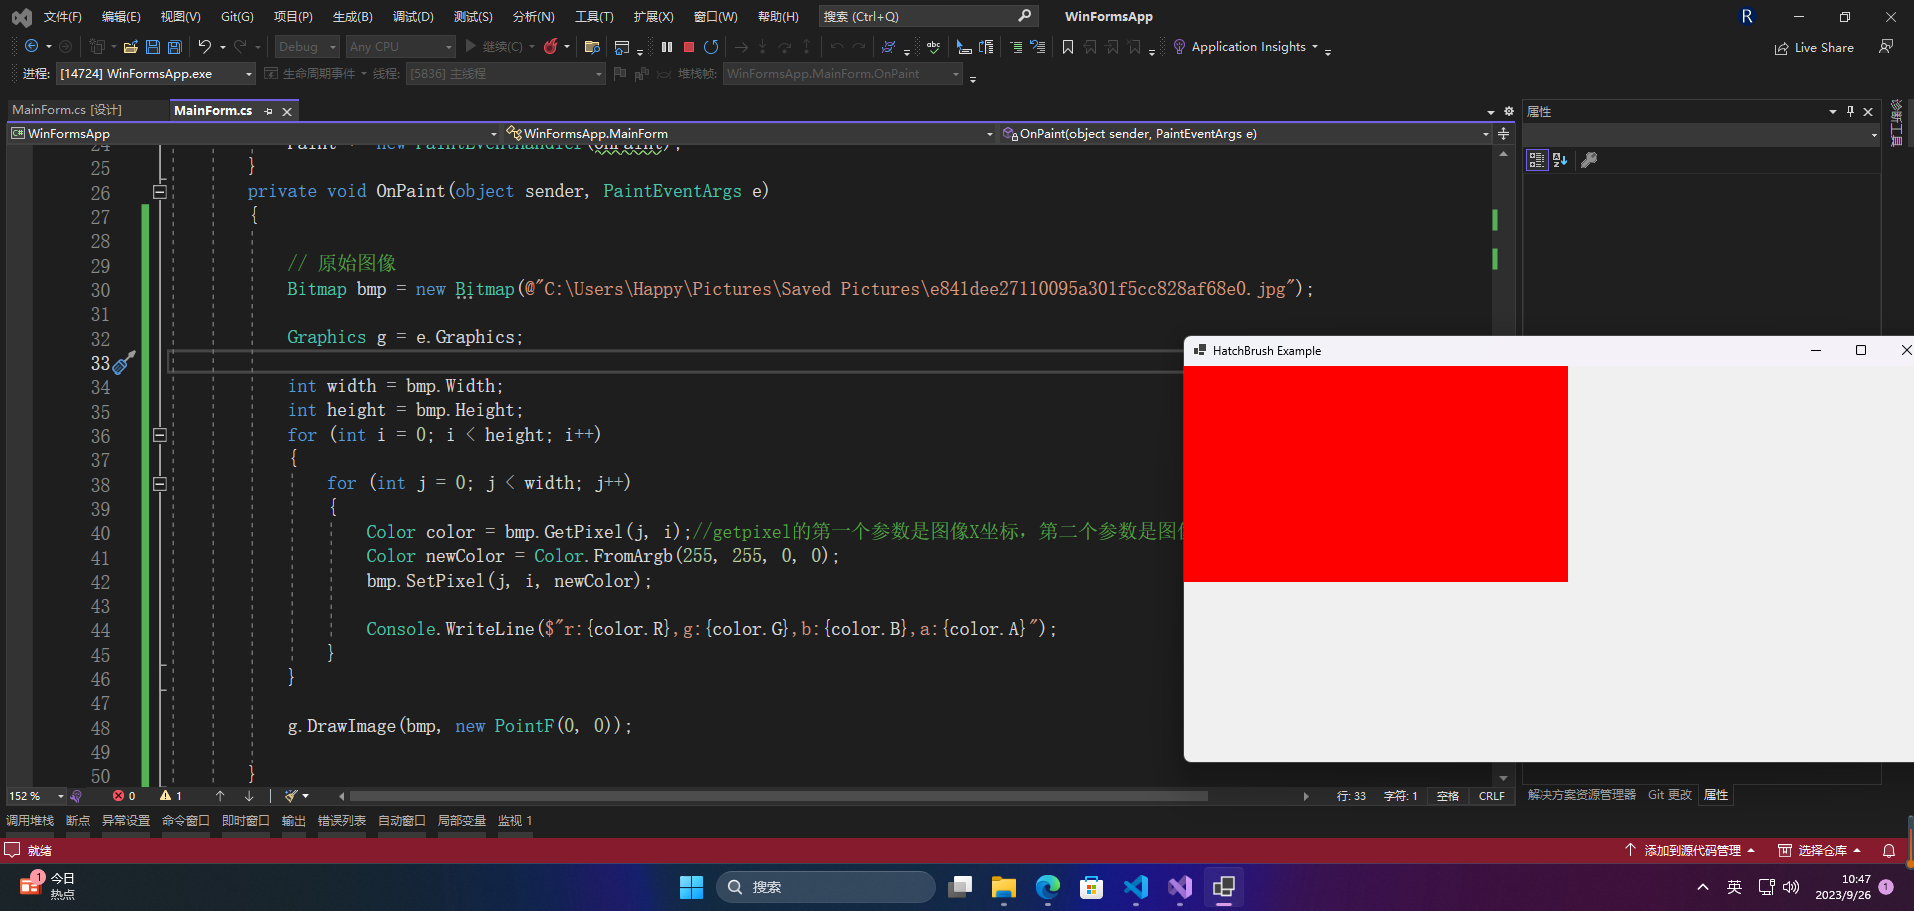
private void OnPaint(object sender, PaintEventArgs e)
    Graphics g = e.Graphics;
    Bitmap bmp = new Bitmap(@"C:\Users\Happy\Pictures\Saved Pictures\e841dee27110095a301f5cc828af68e0.jpg");
    g.DrawImage(bmp, 0, 0);//屏幕上图像的大小为屏幕分辨率和图像分辨率的比值
    Console.WriteLine(g.DpiX);
    Console.WriteLine(g.DpiY);
    Console.WriteLine(bmp.HorizontalResolution);
    Console.WriteLine(bmp.VerticalResolution);
    //为了显示和原始图像一样物理尺寸的大小,又由于屏幕分辨率比较低,所以图像的分辨率实际上降低了
    Console.WriteLine($"图像像素{bmp.Size}");
    SizeF s = new SizeF(bmp.Width * (g.DpiX / bmp.HorizontalResolution), bmp.Height * (g.DpiY / bmp.VerticalResolution));
    Console.WriteLine($"屏幕图像像素{s}");
    Rectangle r = new Rectangle(0, 100, bmp.Width, bmp.Height);
    Rectangle sourceR = new Rectangle(0, 0, bmp.Width, bmp.Height);
    g.DrawImage(bmp, r, sourceR, GraphicsUnit.Pixel);//源矩形和目标矩形大小相同时,就不进行图像的缩放,目标矩形大于原始矩形则放大,否则缩小
}
在上面的代码中,首先创建了一个Bitmap对象,然后获取了当前窗体的Graphics对象,并调用其DrawImage方法绘制图像。在绘制图像时,需要传入以下参数:
- Bitmap对象:要绘制的图像。
- Point对象:绘制图像的左上角位置。
- Rectangle对象:要绘制的Bitmap对象中需要呈现的区域。
- GraphicsUnit枚举:指定坐标和显示单位。
🔎2.改变图像分辨率对图像显示的影响
下面是一个简单的示例,说明Bitmap的SetResolution方法改变图像分辨率对图像显示的影响:
using System.Drawing;
using System.Drawing.Drawing2D;
using System.Windows.Forms;
namespace WinFormDemo
    public partial class MainForm : Form
        public MainForm()
            InitializeComponent();
        private void OnPaint(object sender, PaintEventArgs e)
            // 读取图像
            Bitmap bitmap = new Bitmap(@"C:\Users\Happy\Pictures\Saved Pictures\e841dee27110095a301f5cc828af68e0.jpg");
            // 打印原始图像的分辨率
            MessageBox.Show($"原始图像分辨率:{bitmap.HorizontalResolution} × {bitmap.VerticalResolution} DPI");
            // 设置新的分辨率
            bitmap.SetResolution(200, 200);
            // 打印更改后的图像的分辨率
            MessageBox.Show($"更改后图像分辨率:{bitmap.HorizontalResolution} × {bitmap.VerticalResolution} DPI");
            // 绘制图像
            e.Graphics.InterpolationMode = InterpolationMode.HighQualityBicubic;
            e.Graphics.DrawImage(bitmap, 0, 0, 400, 400);
}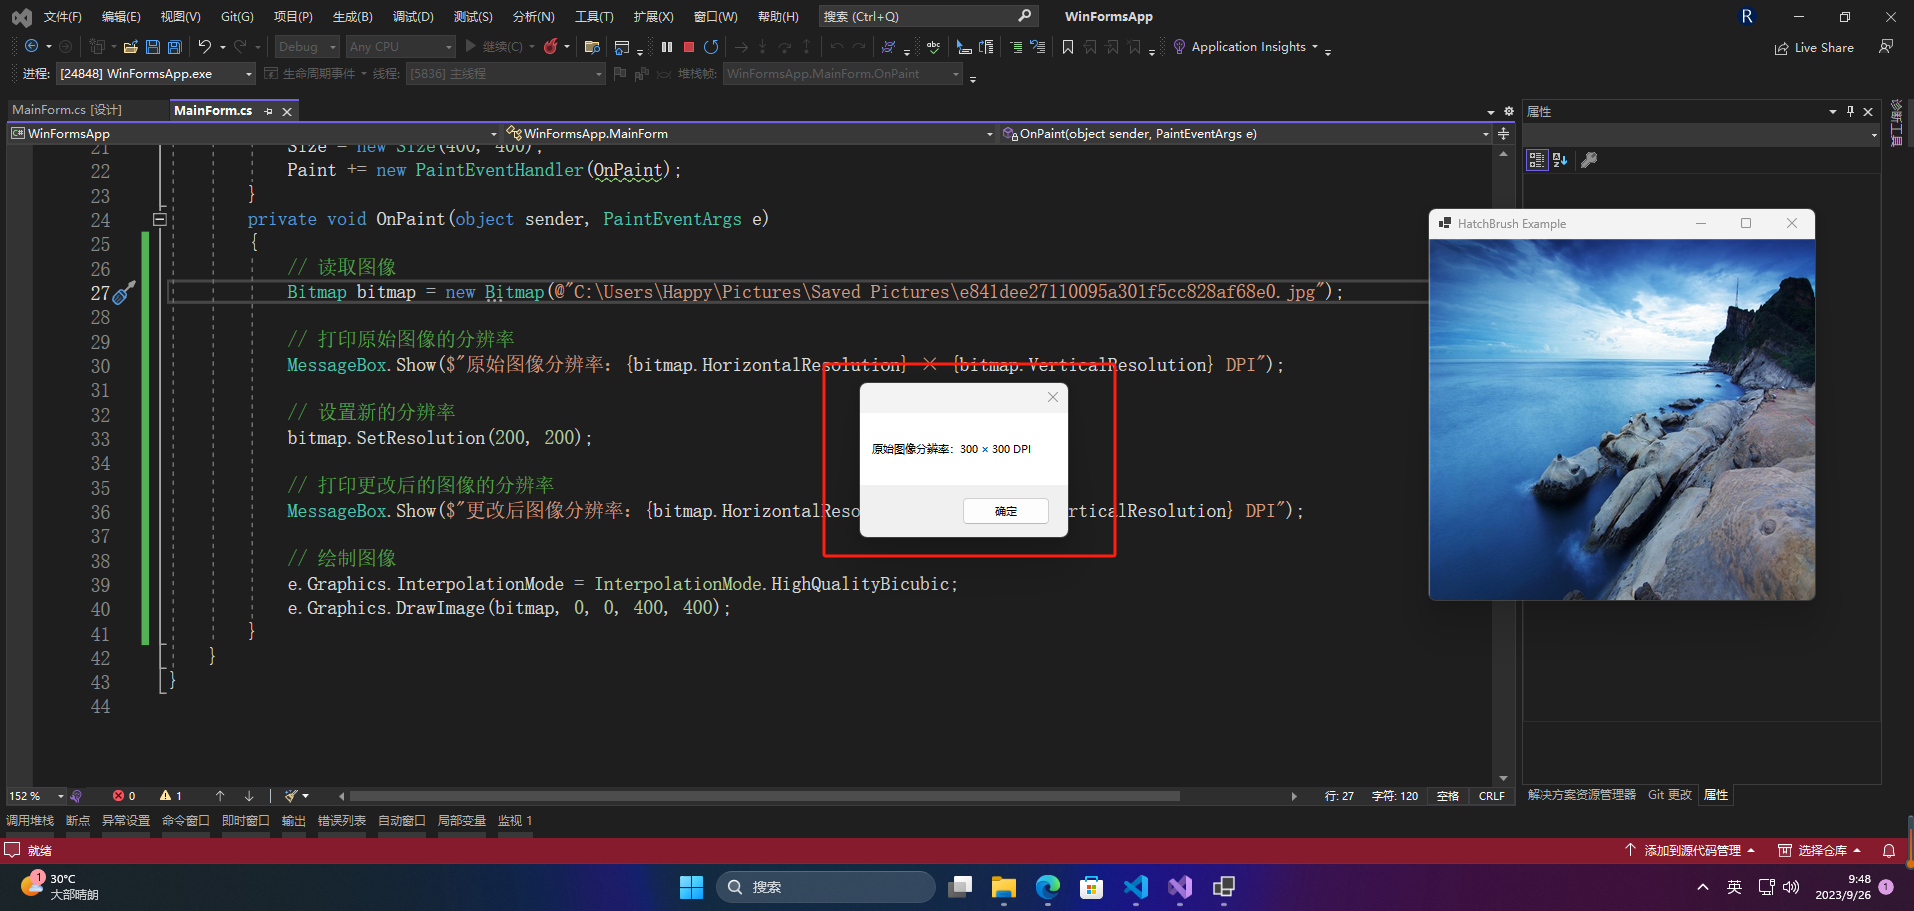
在该示例中,我们读取了一张图像,并分别打印了原始图像和更改后的图像的分辨率。然后,我们在绘制图像时使用了更改后的Bitmap,并将图像大小设置为300×300像素。由于我们将分辨率设置为200×200 DPI,因此该图像的实际大小为2英寸×2英寸。
运行示例后,可以看到更改后的图像比原始图像更小,但更加清晰。当然,具体影响取决于实际情况,该示例只是为了演示Bitmap的SetResolution方法的使用方式。
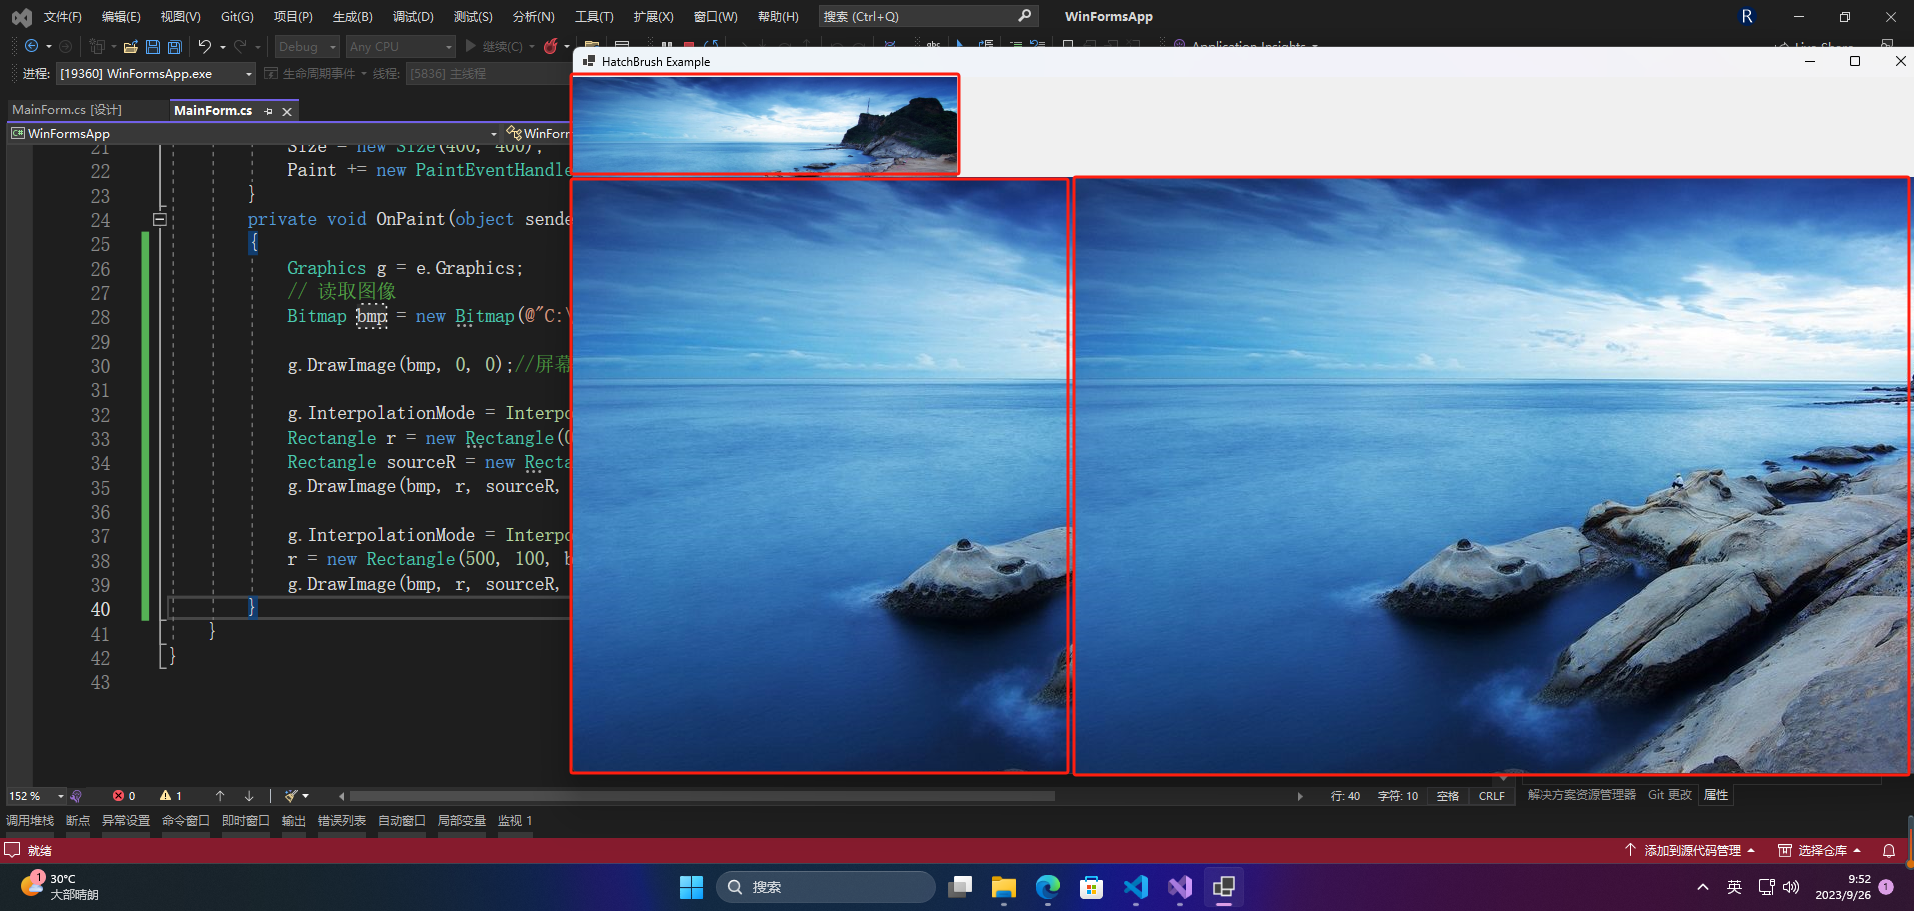
🔎3.使用插值算法对图像进行缩放
在WinForm中使用DrawImage方法进行图像缩放时,可以使用插值算法来提高图像的质量。插值算法是一种通过已知数据点来估计未知点的方法。在图像缩放时,插值算法通过已知像素点的颜色值来估计未知像素点的颜色值,从而实现图像的缩放。
.NET Framework提供了多种插值算法,可以通过Graphics类的InterpolationMode属性来设置。以下是常用的插值算法:
- NearestNeighbor:使用最近邻插值算法,在图像缩放时只考虑最接近像素点的颜色值,速度快但质量较低。
- Bilinear:使用双线性插值算法,在图像缩放时考虑最近的四个像素点的颜色值,速度较快,质量较高。
- HighQualityBilinear:使用高质量双线性插值算法,在图像缩放时考虑最近的四个像素点的颜色值,质量更高,但速度较慢。
- Bicubic:使用双三次插值算法,在图像缩放时考虑最近的16个像素点的颜色值,质量最高,但速度最慢。
以下是使用Bilinear插值算法对图像进行缩放的示例代码:
private void OnPaint(object sender, PaintEventArgs e)
    Graphics g = e.Graphics;
    // 读取图像
    Bitmap bmp = new Bitmap(@"C:\Users\Happy\Pictures\Saved Pictures\e841dee27110095a301f5cc828af68e0.jpg");
    g.DrawImage(bmp, 0, 0);//屏幕上图像的大小为屏幕分辨率和图像分辨率的比值
    g.InterpolationMode = InterpolationMode.NearestNeighbor;
    Rectangle r = new Rectangle(0, 100, bmp.Width, bmp.Height);
    Rectangle sourceR = new Rectangle(0, 0, bmp.Width, bmp.Height);
    g.DrawImage(bmp, r, sourceR, GraphicsUnit.Pixel);//源矩形和目标矩形大小相同时,就不进行图像的缩放,目标矩形大于原始矩形则放大,否则缩小
    g.InterpolationMode = InterpolationMode.HighQualityBicubic;
    r = new Rectangle(500, 100, bmp.Width, bmp.Height);
    g.DrawImage(bmp, r, sourceR, GraphicsUnit.Pixel);
}
🔎4.图像裁剪
可以使用Graphics对象的DrawImage方法绘制图像,并通过参数指定绘制的位置和大小。在指定绘制大小时,可以使用Rectangle结构体指定裁剪的区域。
下面是一个示例代码,演示如何在WinForm中裁剪图像:
private void OnPaint(object sender, PaintEventArgs e)
    // 读取图像
    Bitmap image = new Bitmap(@"C:\Users\Happy\Pictures\Saved Pictures\e841dee27110095a301f5cc828af68e0.jpg");
    // 指定裁剪区域
    Rectangle sourceRect = new Rectangle(50, 50, 100, 100);
    // 指定绘制区域
    Rectangle destRect = new Rectangle(0, 0, 200, 200);
    // 绘制图像,只绘制裁剪区域
    e.Graphics.DrawImage(image, destRect, sourceRect, GraphicsUnit.Pixel);
}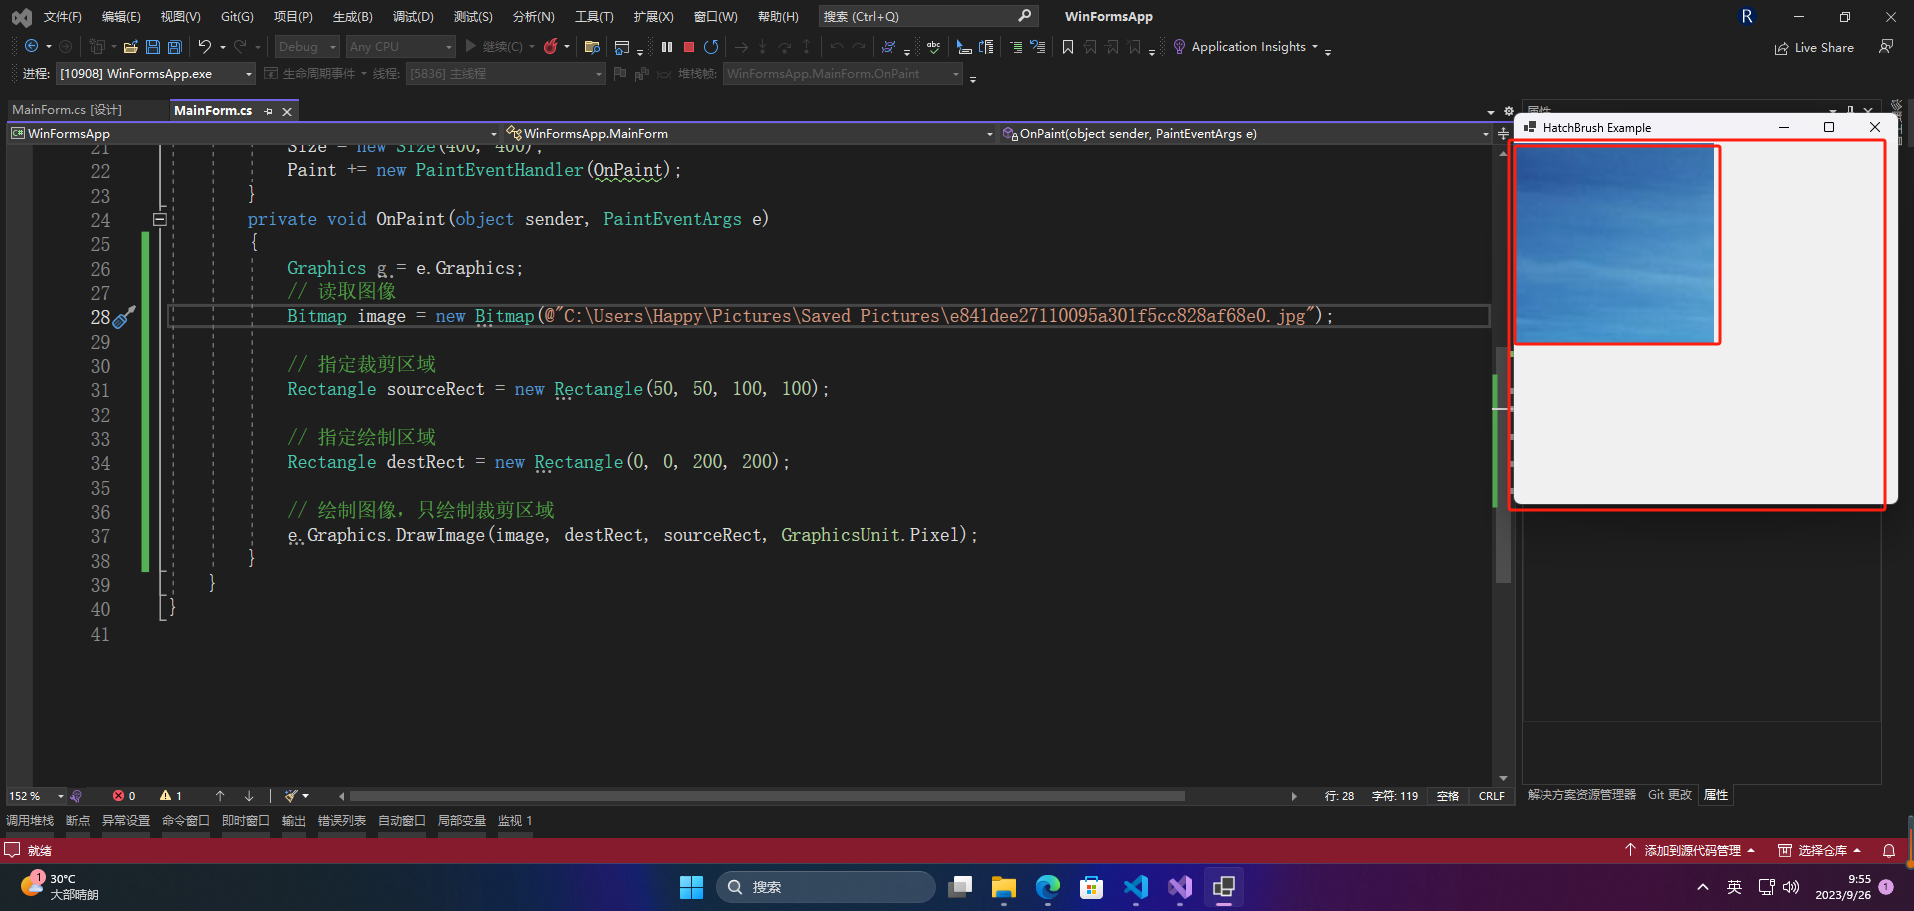
在上面的代码中,首先通过From.File方法加载图像,然后使用Rectangle结构体指定裁剪区域和绘制区域。最后使用Graphics对象的DrawImage方法绘制图像,只绘制裁剪区域。
🔎5.图像的变形(仿射变换)
在WinForm中,可以使用Graphics类的DrawImage方法进行图像的绘制。在绘制时,可以使用PointF类型的参数指定图像的位置和大小,从而实现比例缩放和平移等变换。
如果需要进行仿射变换,可以使用Matrix类的TransformPoints方法将图像的顶点进行变换,然后使用Graphics类的DrawImage方法绘制变换后的图像。
以下是一个简单的示例:
private void OnPaint(object sender, PaintEventArgs e)
    // 读取图像
    Bitmap bmp = new Bitmap(@"C:\Users\Happy\Pictures\Saved Pictures\e841dee27110095a301f5cc828af68e0.jpg");
    // 定义变换矩阵
    Matrix matrix = new Matrix();
    matrix.Translate(50, 50);    // 平移
    matrix.Scale(0.5f, 0.5f);    // 缩放
    PointF[] points = {
        new PointF(0, 0),       // 左上角
        new PointF(bmp.Width, 100),    // 右上角
        new PointF(0, bmp.Height)   // 左下角
    matrix.TransformPoints(points);    // 变换顶点
    // 绘制图像
    e.Graphics.DrawImage(bmp, points);
}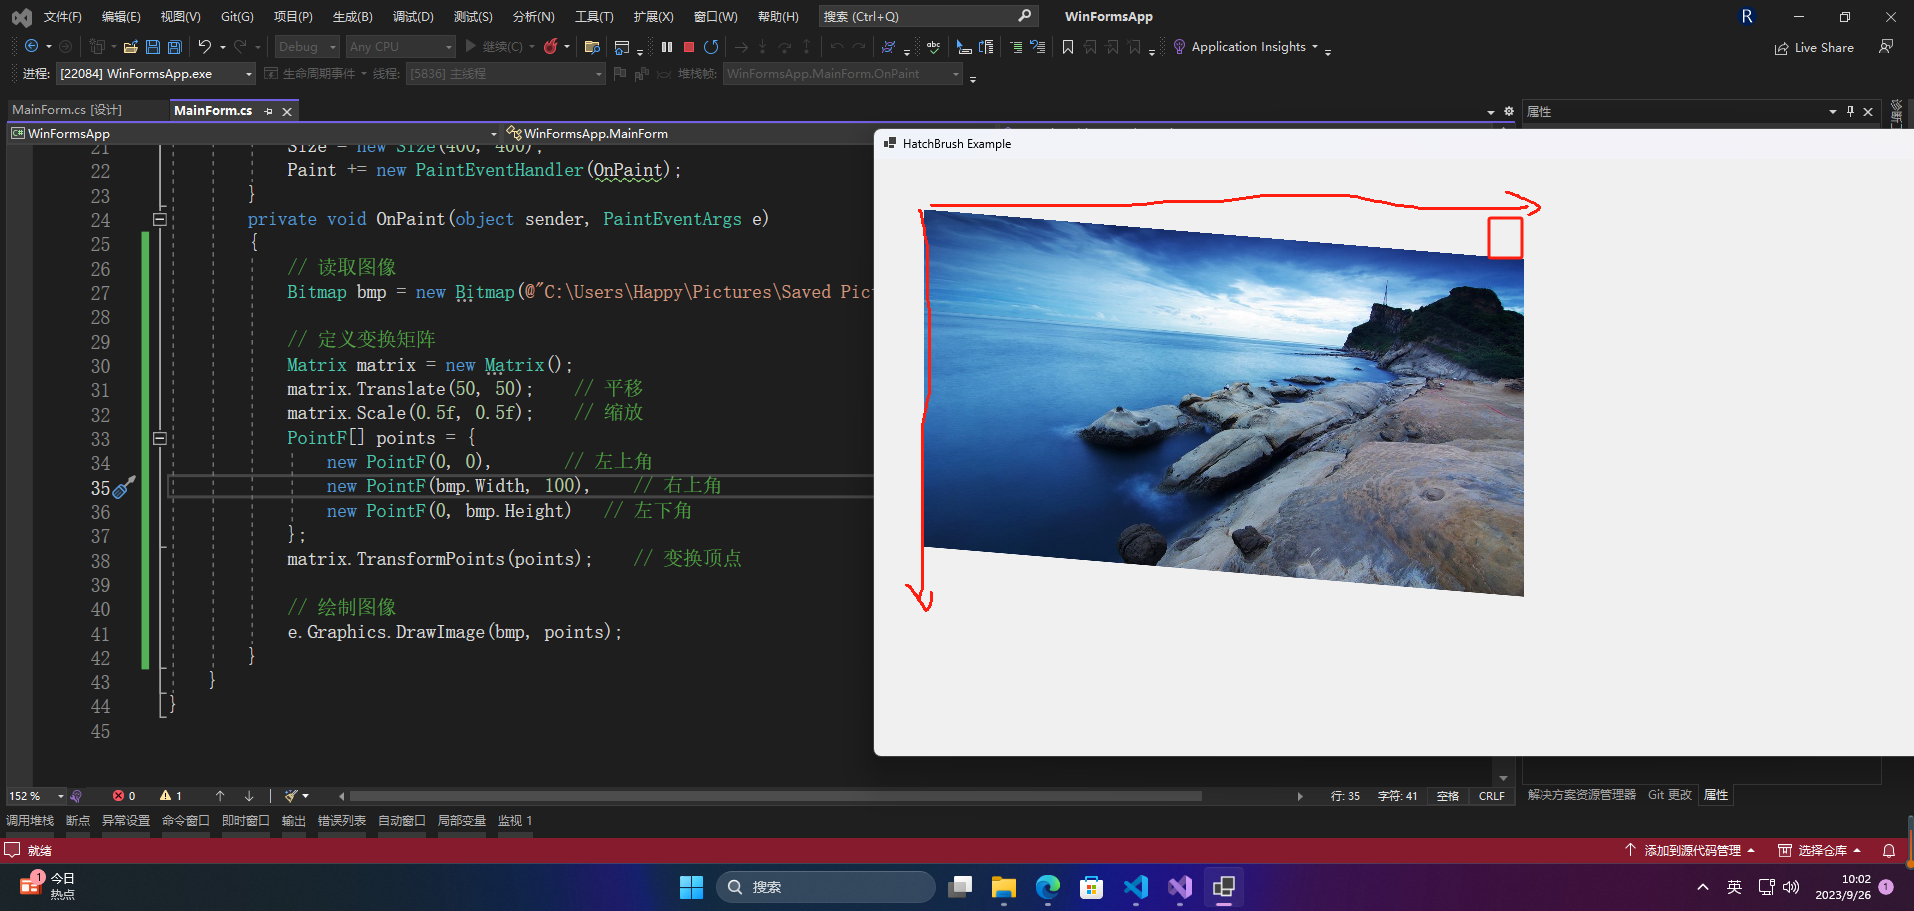
在上述示例中,首先将图像进行平移和缩放,然后将顶点进行变换,最后使用DrawImage方法绘制变换后的图像。
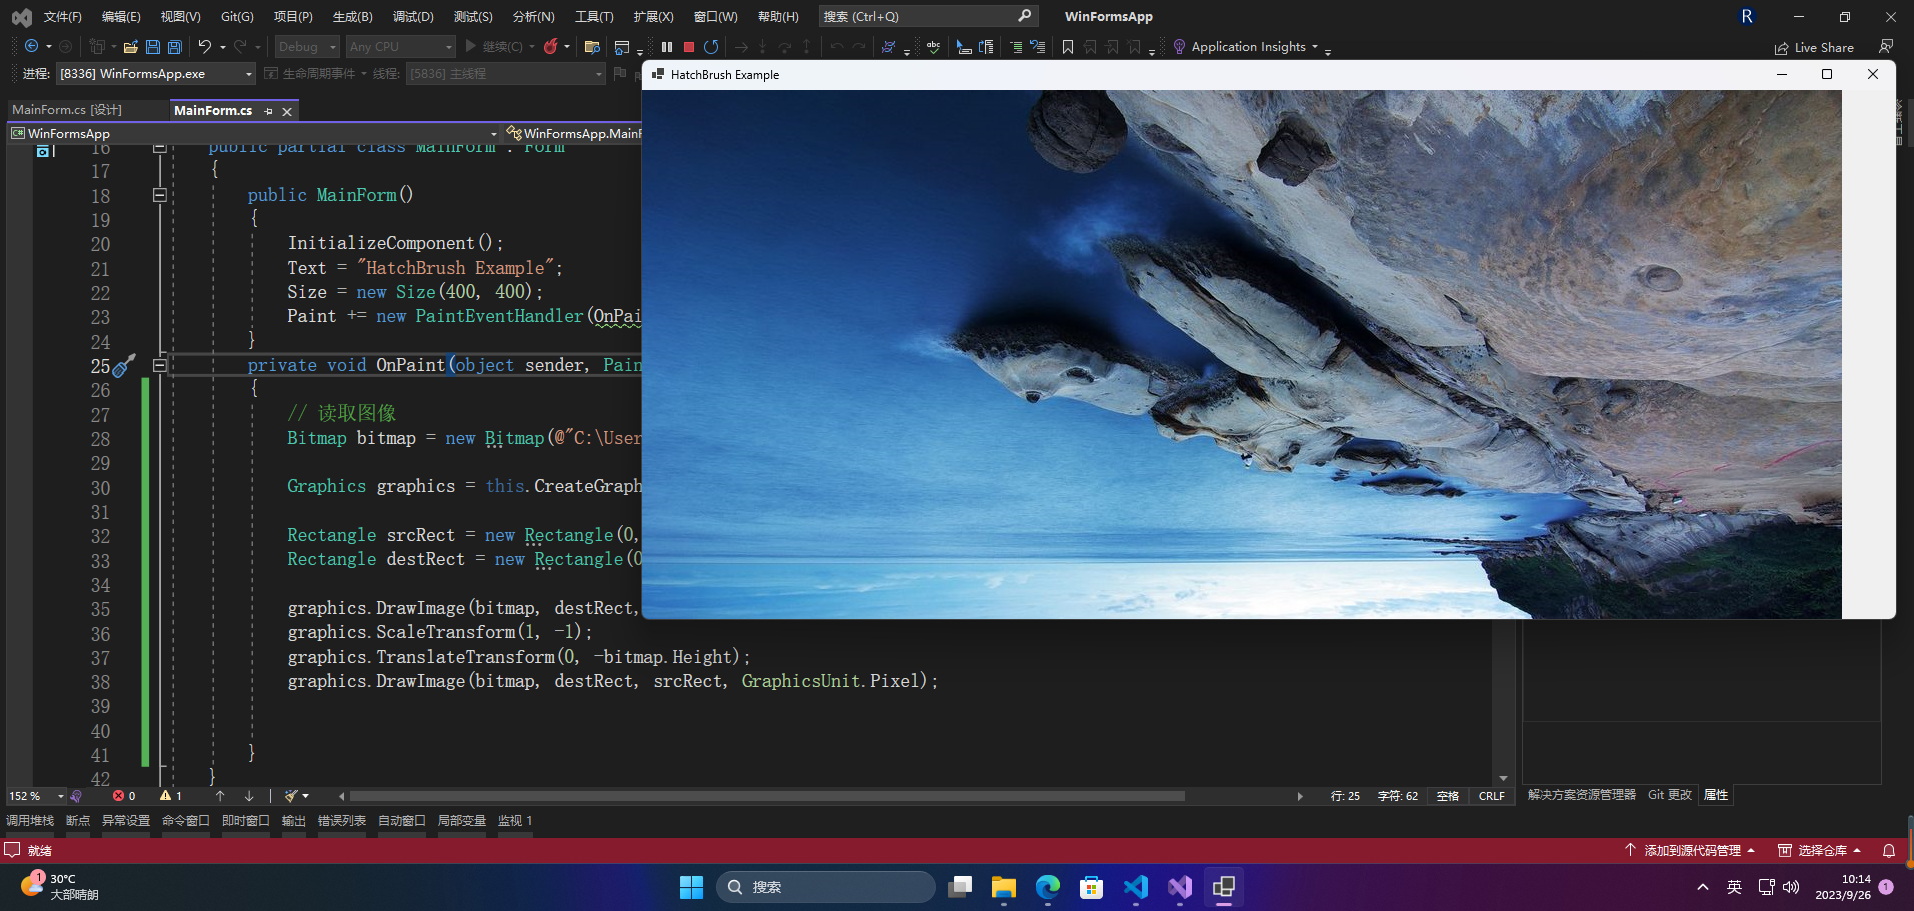
🔎6.图像翻转(上下对折)
在WinForm中使用DrawImage方法进行图像翻转(上下对折),可以通过以下步骤实现:
- 加载图像资源
Bitmap bitmap = new Bitmap("ImageFilePath.png");- 创建Graphics对象
Graphics graphics = this.CreateGraphics();- 创建Point对象
Point startPoint = new Point(0, 0); // 图像绘制的起点,这里设为左上角- 创建Rectangle对象
Rectangle srcRect = new Rectangle(0, 0, bitmap.Width, bitmap.Height); // 原图像的大小
Rectangle destRect = new Rectangle(0, 0, bitmap.Width, bitmap.Height); // 目标图像的大小- 调用Graphics对象的DrawImage方法,将原图像绘制在目标图像上
graphics.DrawImage(bitmap, destRect, srcRect, GraphicsUnit.Pixel);- 调用Graphics对象的ScaleTransform方法,对图像进行上下对折
graphics.ScaleTransform(1, -1); // 上下对折- 调用Graphics对象的TranslateTransform方法,将图像移动到正确的位置
graphics.TranslateTransform(0, -bitmap.Height); // 向上移动原图像的高度- 再次调用DrawImage方法,将上下对折后的图像绘制在窗口上
graphics.DrawImage(bitmap, destRect, srcRect, GraphicsUnit.Pixel);完整代码示例:
private void OnPaint(object sender, PaintEventArgs e)
    // 读取图像
    Bitmap bitmap = new Bitmap(@"C:\Users\Happy\Pictures\Saved Pictures\e841dee27110095a301f5cc828af68e0.jpg");
    Graphics graphics = this.CreateGraphics();
    Rectangle srcRect = new Rectangle(0, 0, bitmap.Width, bitmap.Height);
    Rectangle destRect = new Rectangle(0, 0, bitmap.Width, bitmap.Height);
    graphics.DrawImage(bitmap, destRect, srcRect, GraphicsUnit.Pixel);
    graphics.ScaleTransform(1, -1);
    graphics.TranslateTransform(0, -bitmap.Height);
    graphics.DrawImage(bitmap, destRect, srcRect, GraphicsUnit.Pixel);
}
🔎7.旋转
在WinForm中使用DrawImage进行旋转,可以使用Graphics类中的RotateTransform方法来实现。该方法可以将图像沿着指定的角度旋转,并且可以选择以图像中心点为中心旋转或者以指定的点为中心旋转。需要注意的是,该方法旋转的是整个绘图区域,而不是单个图像,因此需要在旋转之前将绘图区域设置到指定的图像位置。
下面是一个使用Point进行旋转的示例代码:
private void OnPaint(object sender, PaintEventArgs e)
    // 读取图像
    Bitmap bitmap = new Bitmap(@"C:\Users\Happy\Pictures\Saved Pictures\e841dee27110095a301f5cc828af68e0.jpg");
    Point point = new Point(100, 100);
    float angle = 45;
    // 将绘图区域设置到指定图像位置
    e.Graphics.TranslateTransform(point.X, point.Y);
    // 以图像中心点为中心旋转
    e.Graphics.RotateTransform(angle, System.Drawing.Drawing2D.MatrixOrder.Prepend);
    // 将图像移回原始位置
    e.Graphics.TranslateTransform(-point.X, -point.Y);
    // 绘制图像
    e.Graphics.DrawImage(bitmap, point);
}
在该示例中,通过调用TranslateTransform方法将绘图区域设置到指定的图像位置,然后调用RotateTransform方法进行旋转。旋转完成后,再调用TranslateTransform方法将图像移回原始位置,最后调用DrawImage方法绘制图像。
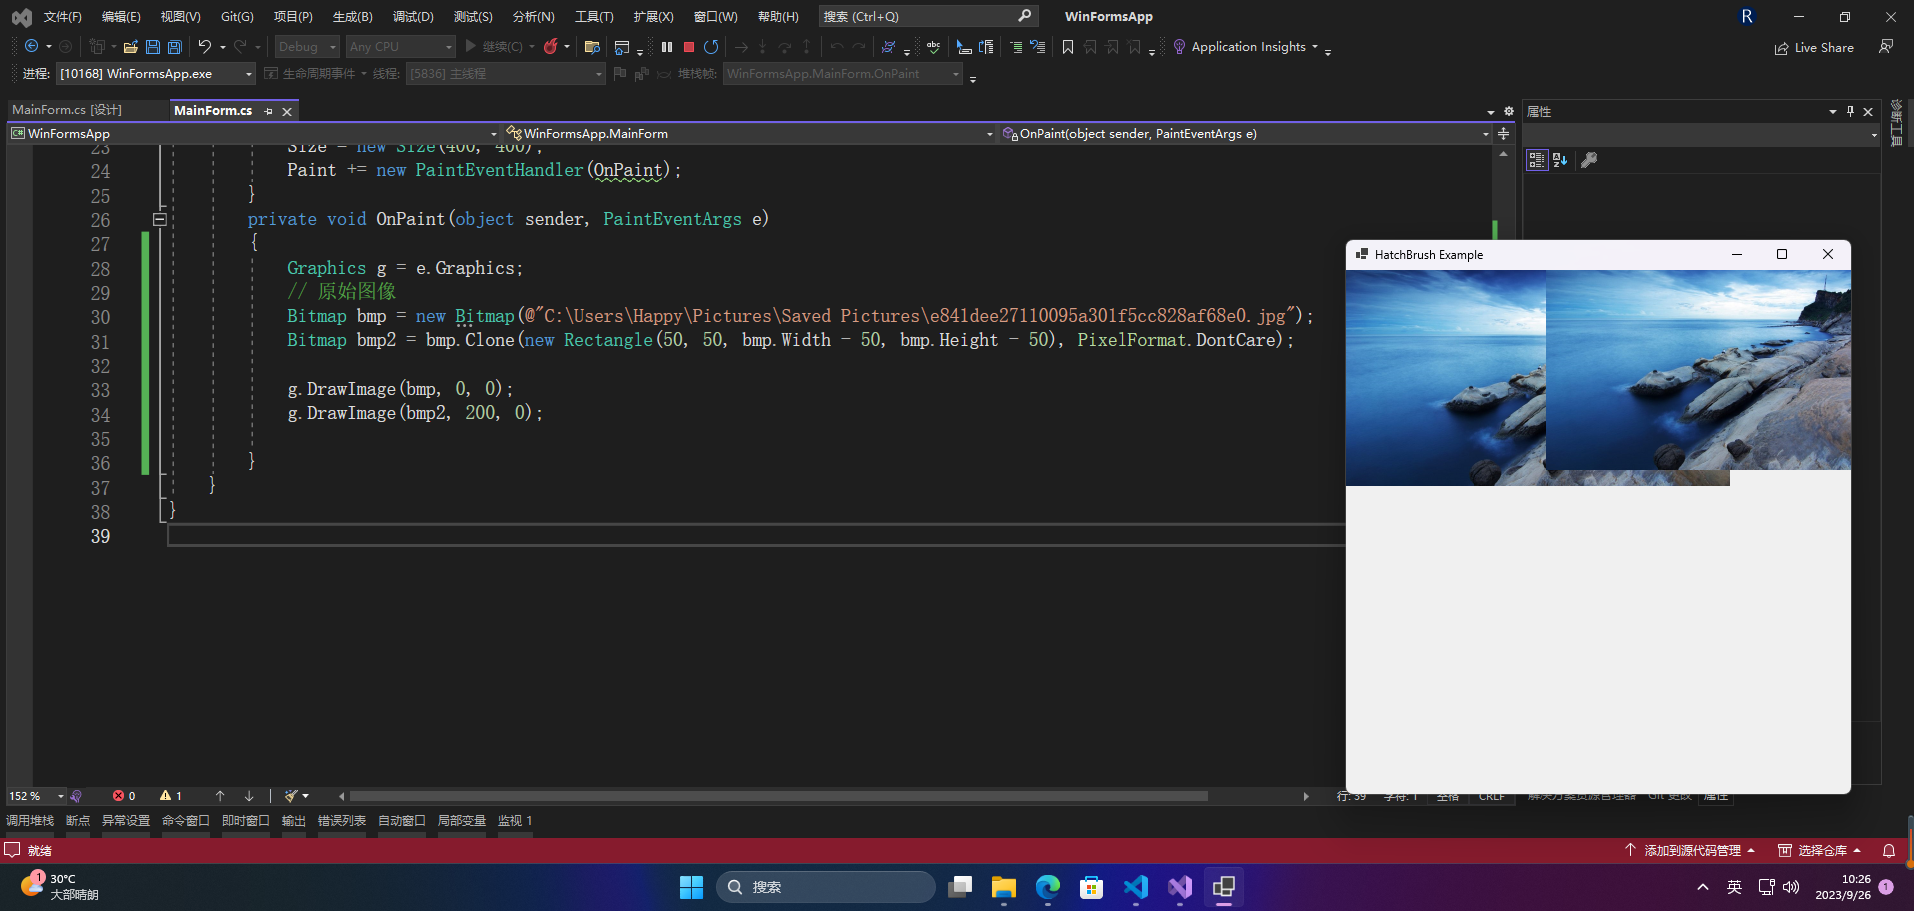
🔎8.复制图像
private void OnPaint(object sender, PaintEventArgs e)
    Graphics g = e.Graphics;
    // 原始图像
    Bitmap bmp = new Bitmap(@"C:\Users\Happy\Pictures\Saved Pictures\e841dee27110095a301f5cc828af68e0.jpg");
    Bitmap bmp2 = bmp.Clone(new Rectangle(50, 50, bmp.Width - 50, bmp.Height - 50), PixelFormat.DontCare);
    g.DrawImage(bmp, 0, 0);
    g.DrawImage(bmp2, 200, 0);
}
🔎9.在内存中创建位图
如果要在内存中创建位图并使用DrawImage方法绘制到控件上,可以使用以下代码示例:
private void OnPaint(object sender, PaintEventArgs e)
    // 创建一个位图
    Bitmap bitmap = new Bitmap(100, 100);
    // 获取位图的Graphics对象
    Graphics bitmapGraphics = Graphics.FromImage(bitmap);
    // 绘制位图
    Pen pen = new Pen(Color.Red);
    bitmapGraphics.DrawLine(pen, 0, 0, 100, 100);
    pen.Dispose();
    bitmapGraphics.Dispose();
    // 在控件上绘制位图
    e.Graphics.DrawImage(bitmap, 0, 0);
    // 释放位图对象
    bitmap.Dispose();
}
在上面的示例中,我们首先创建了一个100x100大小的位图。接着,我们获取位图的Graphics对象,使用它来绘制线条。最后,我们在控件上使用DrawImage方法绘制位图,并释放位图对象。
🔎10.双倍缓存
在WinForm中使用GDI+绘图时,如果不使用双倍缓存,会出现画面闪烁的问题。为了解决这个问题,可以使用双倍缓存进行绘图。
双倍缓存的原理是在内存中创建一个与屏幕大小相同的位图,先将所有绘图操作在位图中进行,最后一次性将整个位图绘制到屏幕上,从而避免了在屏幕上绘制不完整的图像,从而消除了闪烁问题。
public class DoubleBufferedPanel : Panel
    public DoubleBufferedPanel()
   	    //this.SetStyle(ControlStyles.OptimizedDoubleBuffer, true);
        //this.SetStyle(ControlStyles.AllPaintingInWmPaint ,true);
        //this.SetStyle(ControlStyles.UserPaint ,true );
        DoubleBuffered = true;
public partial class Form1 : Form
    private Bitmap m_buffer;
    public Form1()
        InitializeComponent();
        // 创建位图
        m_buffer = new Bitmap(ClientSize.Width, ClientSize.Height);
        // 绑定绘图事件
        doubleBufferedPanel1.Paint += doubleBufferedPanel1_Paint;
    private void doubleBufferedPanel1_Paint(object sender, PaintEventArgs e)
        Graphics g = e.Graphics;
        // 在位图上进行绘制操作
        using (Graphics bufferGraphics = Graphics.FromImage(m_buffer))
            // 在位图上绘制图像
            bufferGraphics.DrawImage(image, 0, 0);
        // 将整个位图一次性绘制到屏幕上
        g.DrawImage(m_buffer, 0, 0);
}
在上面的代码中,我们首先在构造函数中创建了一个与窗口大小相同的位图 m_buffer,然后在双倍缓存面板的绘图事件中,先使用 Graphics.FromImage 方法获取位图的绘图对象,然后再在位图上进行绘制操作,最后一次性将整个位图绘制到屏幕上。
这样就可以消除闪烁问题,让绘图效果更加平滑。
🔎11.处理图像中的alpha成分
在WinForm中使用CompositingMode处理图像中的alpha成分是一种非常有效的处理方法,该方法可以将图像的alpha值与背景混合,从而达到半透明的效果。
private void OnPaint(object sender, PaintEventArgs e)
    Graphics gForm = e.Graphics;
    gForm.CompositingMode = CompositingMode.SourceOver;
    for (int i = 1; i < 7; i++)
        Rectangle rectangle = new Rectangle(i * 30, 0, 15, this.ClientRectangle.Height);
        gForm.FillRectangle(Brushes.Orange, rectangle);
    Bitmap bitmap = new Bitmap(260, 260, System.Drawing.Imaging.PixelFormat.Format32bppArgb);
    Graphics gBmp = Graphics.FromImage(bitmap);
    gBmp.CompositingMode = System.Drawing.Drawing2D.CompositingMode.SourceCopy;//更改已有得像素和alpha
    Color color = Color.FromArgb(0x60, 0xff, 0, 0);
    Brush redBrush = new SolidBrush(color);
    gBmp.FillEllipse(redBrush, 70, 70, 160, 160);
    Color green = Color.FromArgb(0x40, 0, 0xff, 0);
    Brush greenBrush = new SolidBrush(green);
    gBmp.FillRectangle(greenBrush, 10, 10, 140, 140);
    gForm.DrawImage(bitmap, 20, 20, bitmap.Width, bitmap.Height);
}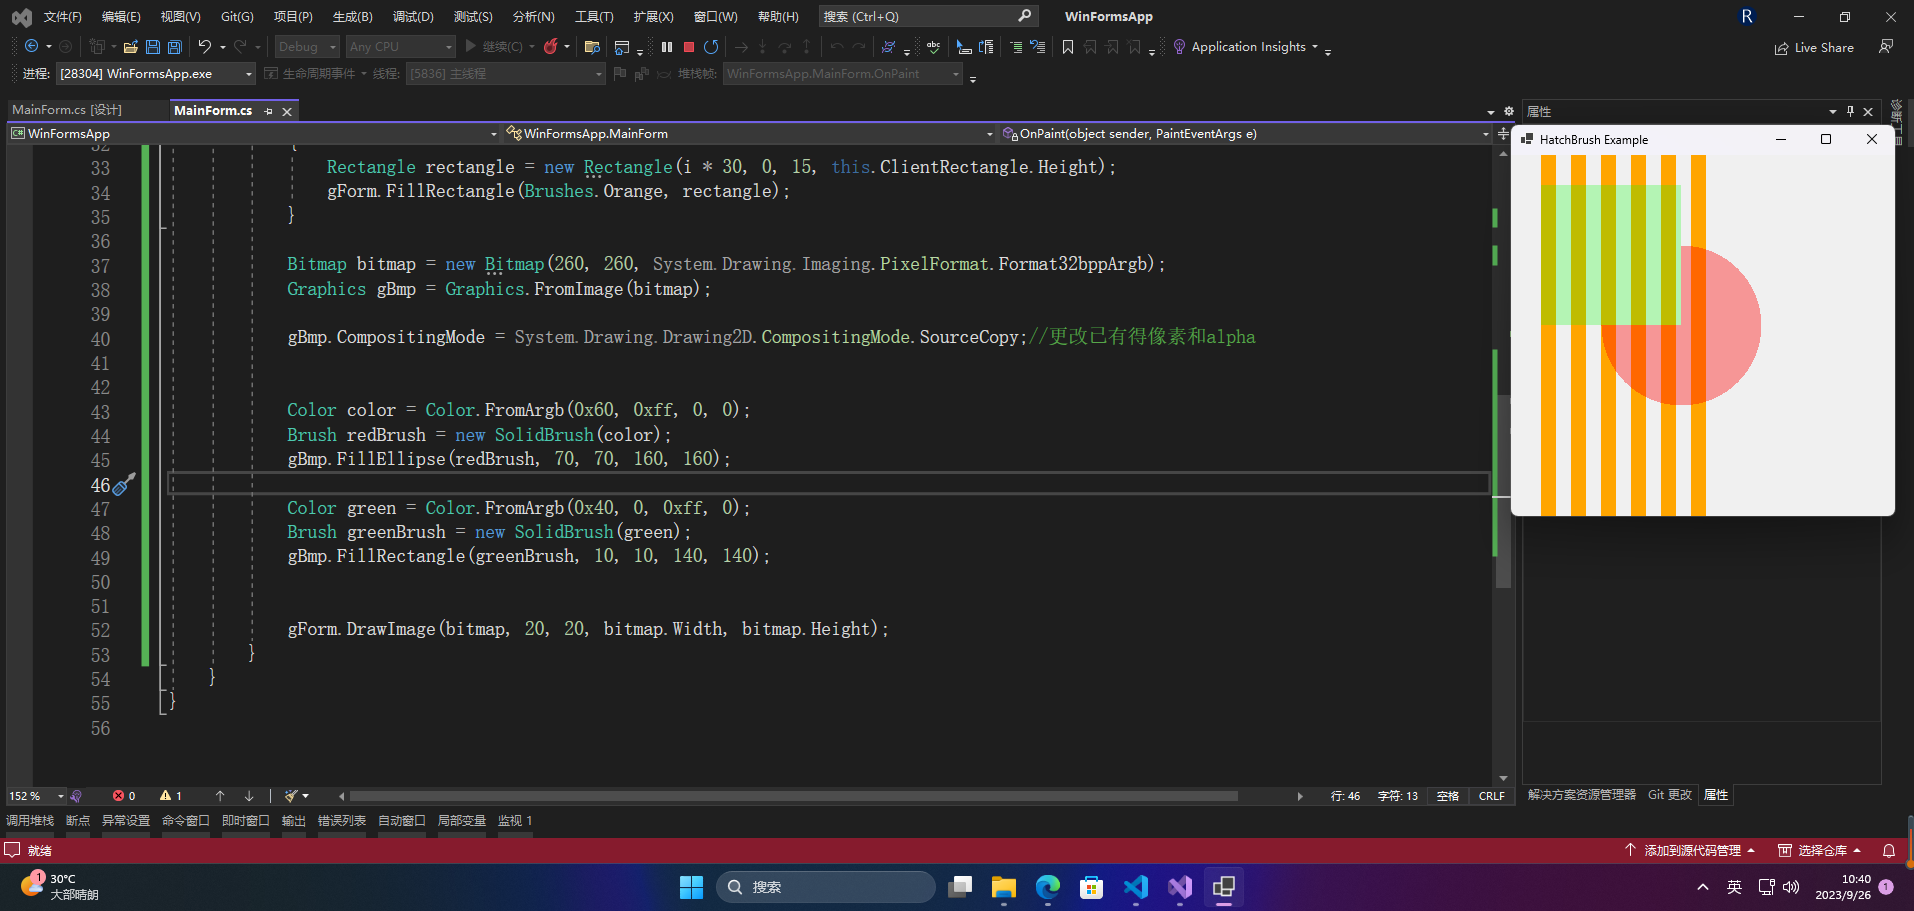
处理alpha有两种方式,一种是覆盖原有得像素以及alpha,对应得CompositingMode.SourceCopy,另一种是和原有的像素进行混合,对应的CompositingMode.SourceOver。
设置CompositingMode属性为CompositingMode.SourceOver,表示采用前景与背景的透明度混合方式。最后,我们调用Graphics对象的DrawImage方法,将前景图像绘制到背景图像上,最终得到一个混合后的半透明图像。最后,将处理后的Bitmap对象赋值给PictureBox的Image属性,就可以在界面上显示处理后的图像。
需要注意的是,这种方式处理透明度时需要保证背景和前景图像的尺寸一致,否则会出现边缘不透明或者重叠的问题。此外,还需要注意CompositingMode属性的正确设置,否则处理后的图像效果可能不正确。
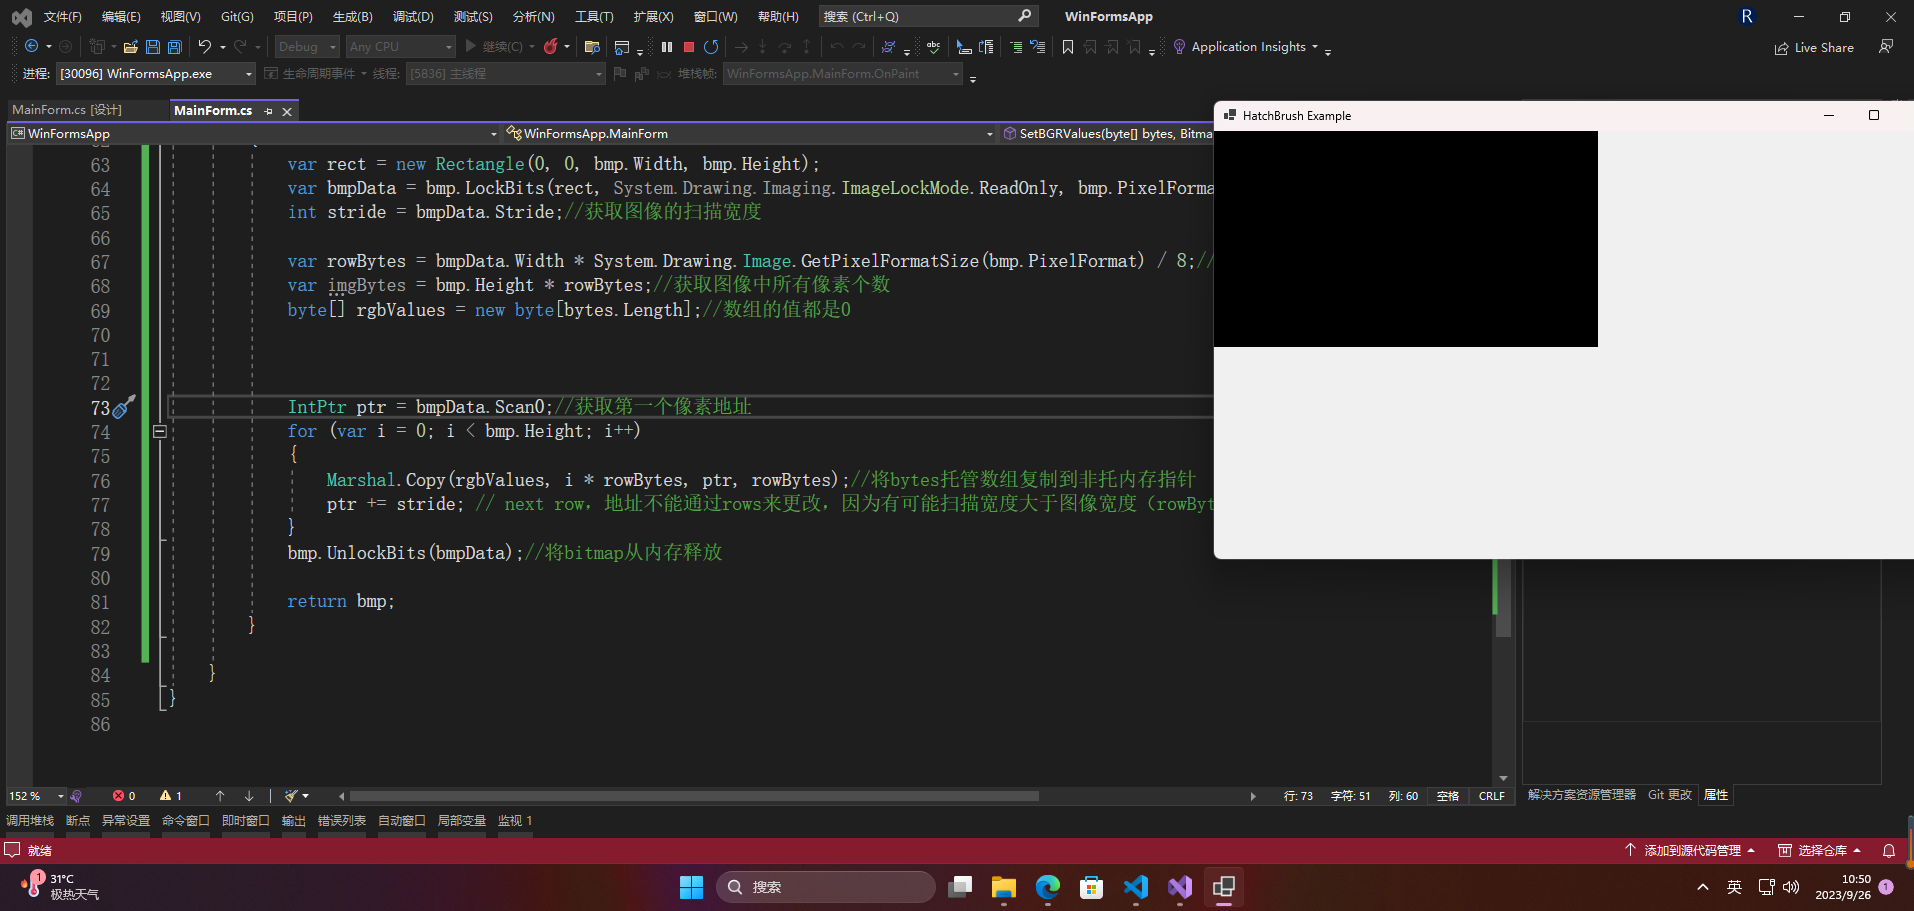
🔎12.获取和设置像素
🦋12.1 GetPixel,SetPixel
private void OnPaint(object sender, PaintEventArgs e)
    // 原始图像
    Bitmap bmp = new Bitmap(@"C:\Users\Happy\Pictures\Saved Pictures\e841dee27110095a301f5cc828af68e0.jpg");
    Graphics g = e.Graphics;
    int width = bmp.Width;
    int height = bmp.Height;
    for (int i = 0; i < height; i++)
        for (int j = 0; j < width; j++)
            Color color = bmp.GetPixel(j, i);//getpixel的第一个参数是图像X坐标,第二个参数是图像Y坐标
            Color newColor = Color.FromArgb(255, 255, 0, 0);
            bmp.SetPixel(j, i, newColor);
            Console.WriteLine($"r:{color.R},g:{color.G},b:{color.B},a:{color.A}");
    g.DrawImage(bmp, new PointF(0, 0));
}
🦋12.2 在系统内存中操作图像
private void OnPaint(object sender, PaintEventArgs e)
    // 原始图像
    Bitmap bmp = new Bitmap(@"C:\Users\Happy\Pictures\Saved Pictures\e841dee27110095a301f5cc828af68e0.jpg");
    Graphics g = e.Graphics;
    byte[] bytes = GetBGRValues(bmp);
    Bitmap newBitmap = SetBGRValues(bytes, bmp);
    g.DrawImage(newBitmap, new PointF(0, 0));
public static byte[] GetBGRValues(Bitmap bmp)
    var rect = new Rectangle(0, 0, bmp.Width, bmp.Height);
    var bmpData = bmp.LockBits(rect, System.Drawing.Imaging.ImageLockMode.ReadOnly, bmp.PixelFormat);//将bitmap锁到系统内存操作
    int stride = bmpData.Stride;//获取图像的扫描宽度
    var rowBytes = bmpData.Width * System.Drawing.Image.GetPixelFormatSize(bmp.PixelFormat) / 8;//获取一行像素数量,要考虑图像位的深度
    var imgBytes = bmp.Height * rowBytes;//获取图像中所有像素个数
    byte[] rgbValues = new byte[imgBytes];
    IntPtr ptr = bmpData.Scan0;//获取第一个像素地址
    for (var i = 0; i < bmp.Height; i++)
        Marshal.Copy(ptr, rgbValues, i * rowBytes, rowBytes);//一行一行的复制
        ptr += stride; // next row,地址不能通过rows来更改,因为有可能扫描宽度大于图像宽度(rowBytes)
    bmp.UnlockBits(bmpData);//将bitmap从内存释放
    return rgbValues;
public static Bitmap SetBGRValues(byte[] bytes, Bitmap bmp)
    var rect = new Rectangle(0, 0, bmp.Width, bmp.Height);
    var bmpData = bmp.LockBits(rect, System.Drawing.Imaging.ImageLockMode.ReadOnly, bmp.PixelFormat);//将bitmap锁到系统内存操作
    int stride = bmpData.Stride;//获取图像的扫描宽度
    var rowBytes = bmpData.Width * System.Drawing.Image.GetPixelFormatSize(bmp.PixelFormat) / 8;//获取一行像素数量,要考虑图像位的深度
    var imgBytes = bmp.Height * rowBytes;//获取图像中所有像素个数
    byte[] rgbValues = new byte[bytes.Length];//数组的值都是0
    IntPtr ptr = bmpData.Scan0;//获取第一个像素地址
    for (var i = 0; i < bmp.Height; i++)
        Marshal.Copy(rgbValues, i * rowBytes, ptr, rowBytes);//将bytes托管数组复制到非托内存指针
        ptr += stride; // next row,地址不能通过rows来更改,因为有可能扫描宽度大于图像宽度(rowBytes)
    bmp.UnlockBits(bmpData);//将bitmap从内存释放
    return bmp;
}
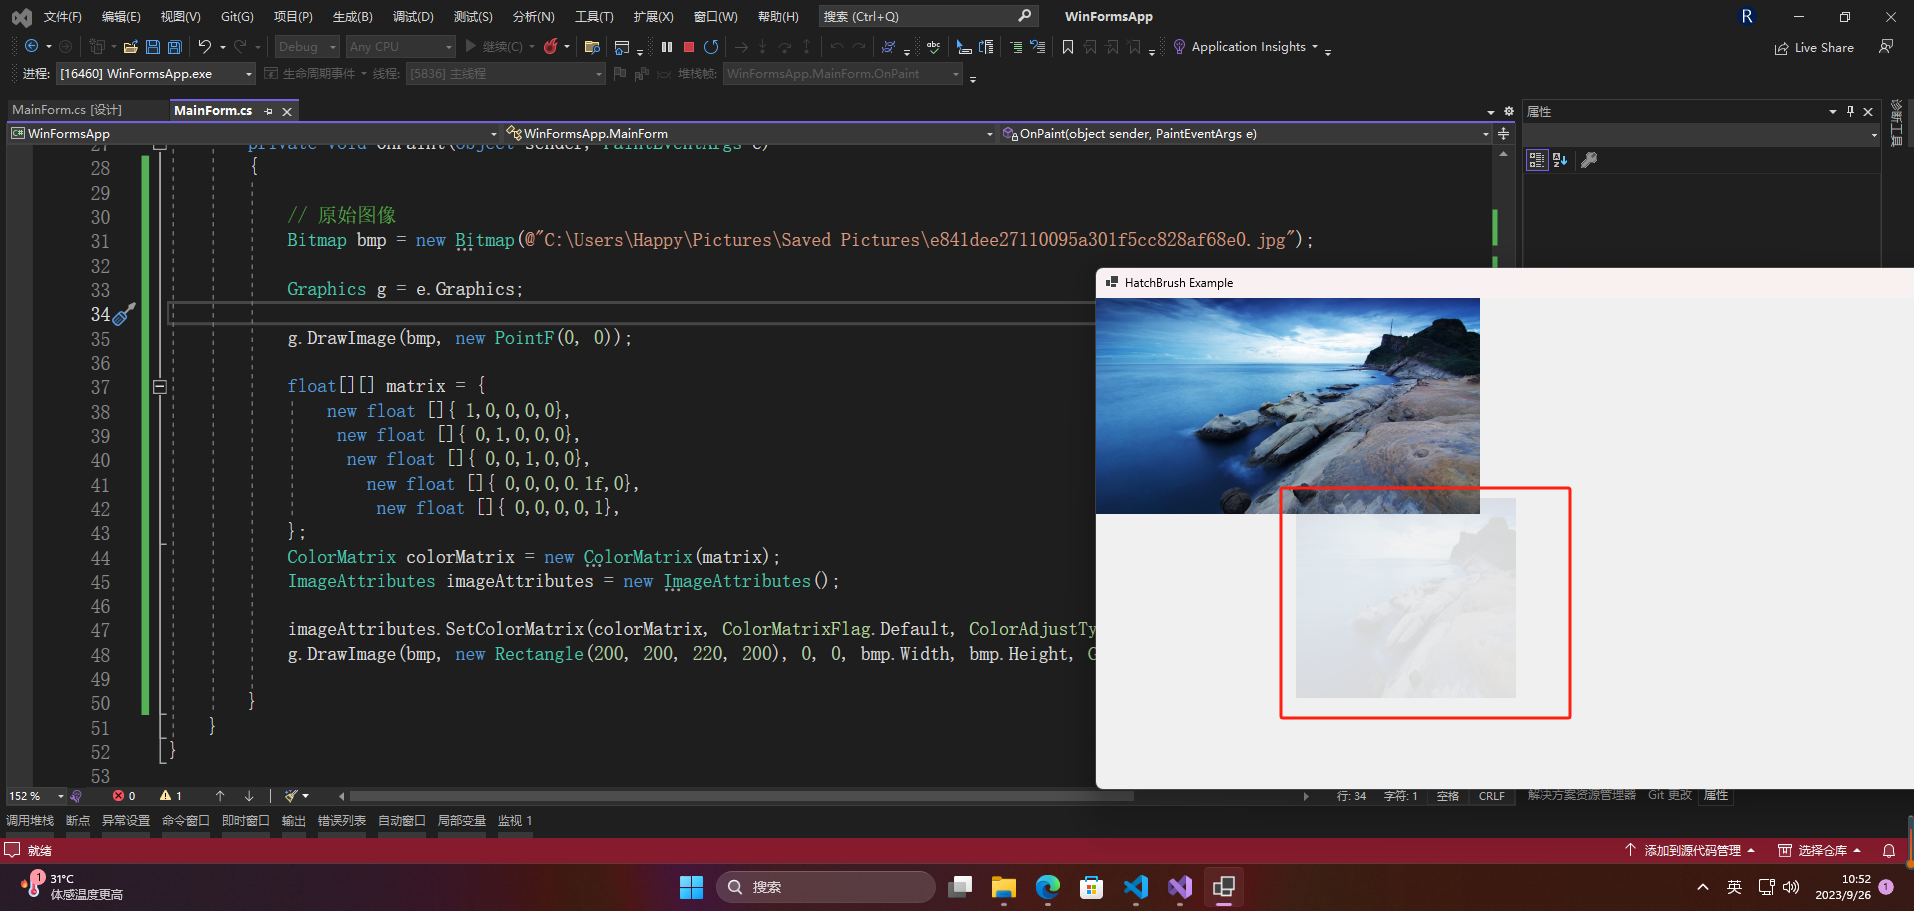
🔎13.创建半透明的图像
private void OnPaint(object sender, PaintEventArgs e)
    // 原始图像
    Bitmap bmp = new Bitmap(@"C:\Users\Happy\Pictures\Saved Pictures\e841dee27110095a301f5cc828af68e0.jpg");
    Graphics g = e.Graphics;
    g.DrawImage(bmp, new PointF(0, 0));
    float[][] matrix = {
        new float []{ 1,0,0,0,0},
         new float []{ 0,1,0,0,0},
          new float []{ 0,0,1,0,0},
            new float []{ 0,0,0,0.1f,0},
             new float []{ 0,0,0,0,1},
    ColorMatrix colorMatrix = new ColorMatrix(matrix);
    ImageAttributes imageAttributes = new ImageAttributes();
    imageAttributes.SetColorMatrix(colorMatrix, ColorMatrixFlag.Default, ColorAdjustType.Bitmap);
    g.DrawImage(bmp, new Rectangle(200, 200, 220, 200), 0, 0, bmp.Width, bmp.Height, GraphicsUnit.Pixel, imageAttributes);
}
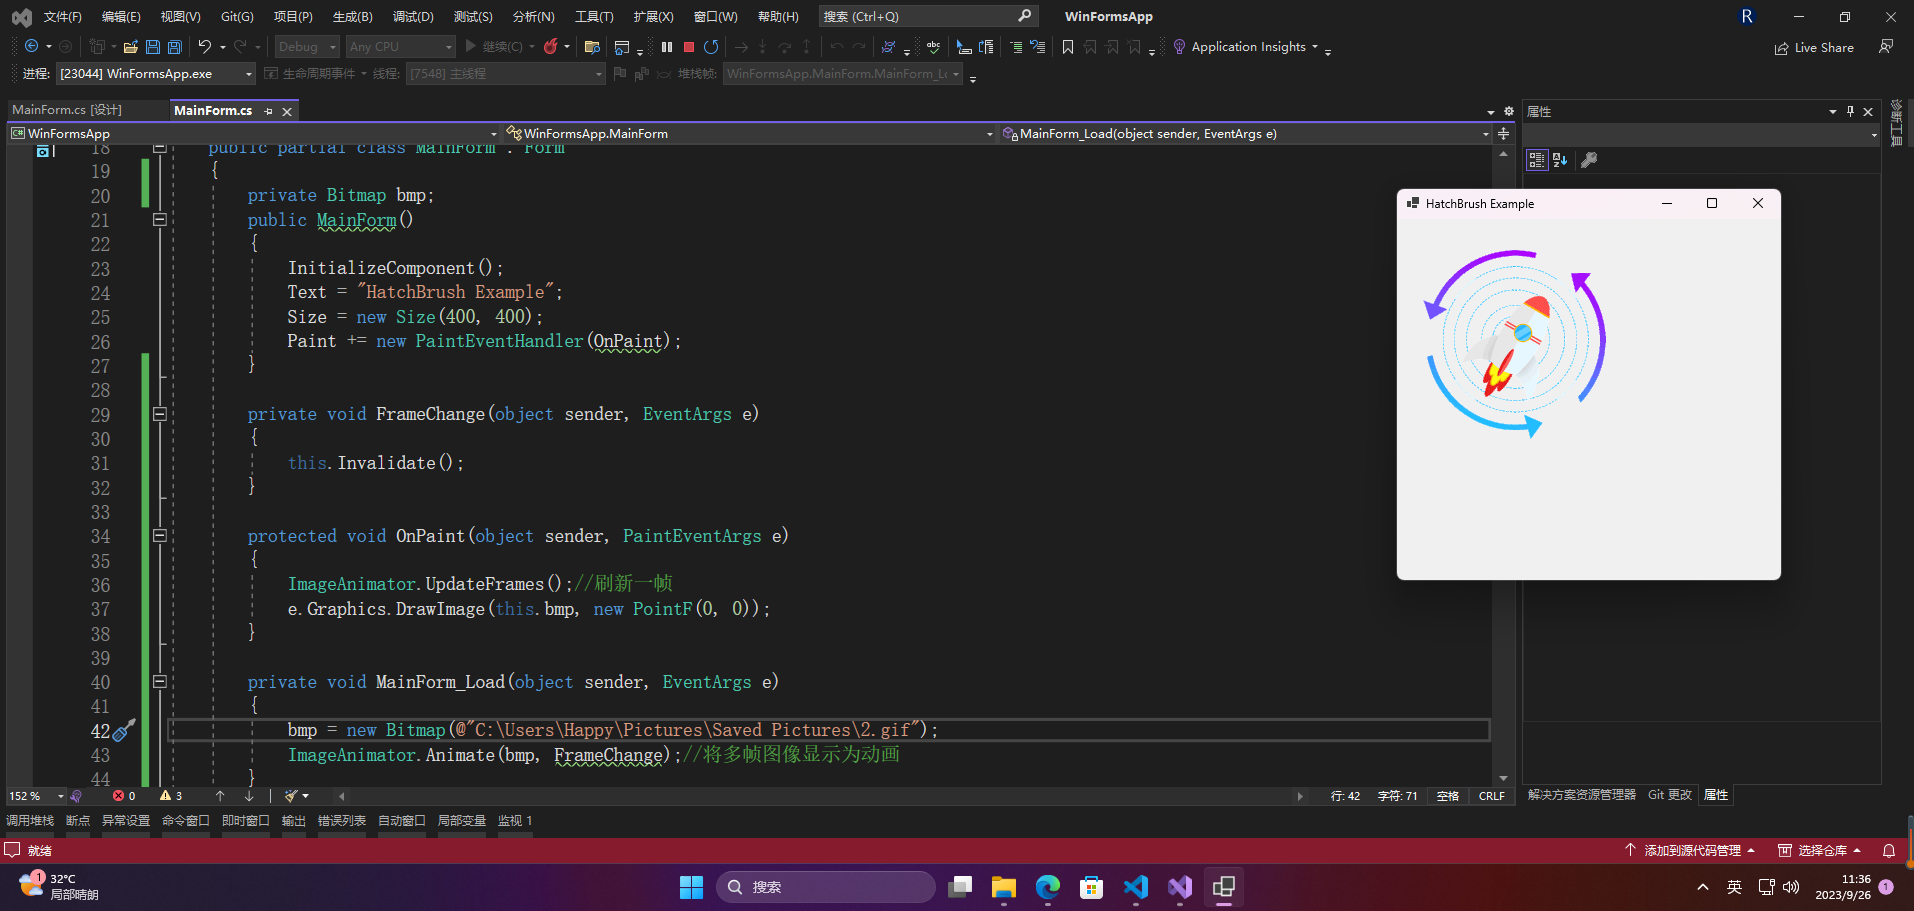
🔎14.播放动画
public partial class MainForm : Form
    private Bitmap bmp;
    public MainForm()
        InitializeComponent();
        Text = "HatchBrush Example";
        Size = new Size(400, 400);
        Paint += new PaintEventHandler(OnPaint);
    private void FrameChange(object sender, EventArgs e)
        this.Invalidate();
    protected void OnPaint(object sender, PaintEventArgs e)
        ImageAnimator.UpdateFrames();//刷新一帧
        e.Graphics.DrawImage(this.bmp, new PointF(0, 0));
    private void MainForm_Load(object sender, EventArgs e)
        bmp = new Bitmap(@"C:\Users\Happy\Pictures\Saved Pictures\2.gif");
        ImageAnimator.Animate(bmp, FrameChange);//将多帧图像显示为动画
}
🔎15.图片类型转换
public partial class MainForm : Form
    public MainForm()
        InitializeComponent();
        Text = "HatchBrush Example";
        Size = new Size(400, 400);
        Paint += new PaintEventHandler(OnPaint);
    protected void OnPaint(object sender, PaintEventArgs e)
        Bitmap bmp = new Bitmap("1.bmp");
        bmp.Save("2.jpg", ImageFormat.Jpeg);
        ImageCodecInfo ici = GetImageEncoder("image/jpeg");
        System.Drawing.Imaging.Encoder enc = System.Drawing.Imaging.Encoder.ColorDepth;
        EncoderParameter ep = new EncoderParameter(enc, 0);//指定压缩等级为0-100
        EncoderParameters epa = new EncoderParameters(1);
        epa.Param[0] = ep;
        bmp.Save("30.jpg", ici, epa);
    private static ImageCodecInfo GetImageEncoder(string mimeType)
        int j;
        ImageCodecInfo[] imageCodecInfos;
        imageCodecInfos = ImageCodecInfo.GetImageEncoders();//获取图像编码器信息
        for (j = 0; j < imageCodecInfos.Length; j++)
            if (imageCodecInfos[j].MimeType == mimeType)