


篇二、CFD CODING之后处理(python)续

这一篇就作为使用python进行后处理的最后一篇了,其内容涉及到高性能可视化库open3d、vispy、altair、vtk。在这一篇之后,利用python实现绝大多数CFD后处理应当是没有大问题了。
6、Python后处理by open3d
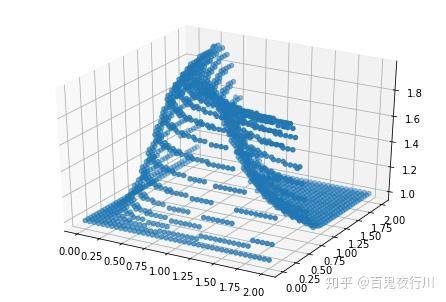
open3d最吸引我的地方是其高性能的点云生成。由于目前还没有四维的数据集,这里先摆一个三维数据,以二维扩散方程的结果为例,并和matplotlib的Axes3D作对比。
import os
import numpy as np
#from open3d import *
import matplotlib.pyplot as plt
from mpl_toolkits.mplot3d import axes3d, Axes3D
nx = 41
dx = 2 / (nx - 1)
nt = 20 # 我们要计算的时间步长数
nu = 0.3 # 粘度值
sigma = .2 # sigma 是一个参数, 我们稍后再学习
dt = sigma * dx**2 / nu # dt 是使用sigma 定义的.. 更晚些学!
u = np.ones(nx) # 一个具有nx 个元素的numpy 数组, 值均等于1。
u[int(.5 / dx):int(1 / dx + 1)] = 2 # 把在0.5和1 之间的u 设置成2。
un = np.ones(nx) # 我们的占位符数组un, 以得到时间上的解
for n in range(nt): # 迭代时间
    un = u.copy() # 将u 的现有值复制到un
    for i in range(1, nx - 1):
        u[i] = un[i] + nu * dt / dx**2 * (un[i+1] - 2 * un[i] + un[i-1])
#matplotlib
x = np.linspace(0, 2, nx)
y = x
x, y = np.meshgrid(x, y)
uheight = []
for i in range(41):
    for j in range(41):
        num = int(np.sqrt(i*j))
        uheight.append(u[num])
height = np.array(uheight).reshape((41,41))
fig = plt.figure()
ax = Axes3D(fig)
ax.plot_surface(x, y, height)
plt.show()
#open3d
x = np.linspace(0, 2, nx)
y = x
points = []
for i in range(nx):
    for j in range(nx):
        points.append([x[i], y[j],height[i][j]])
points = list(points)
print(points)
point_cloud = PointCloud()
point_cloud.points = Vector3dVector(points)
draw_geometries([point_cloud])


emmm晚上我运行这个程序时出来的结果还是黑色背景的,看来它对主题的设置是根据系统当前的一些状态设定的。
相比于matplotlib,open3d具有三维引擎,且可以使用gpu,对更多数量的点云的渲染能力更突出。
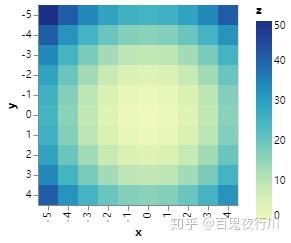
7、Python后处理by Altair
有一个叫Altair的那个仿真软件感觉很不错,以前算RCS的时候用过。这个Altair是一个专门为Python开发的二维数据可视化函数库,内容很丰富,如果用熟的话在二维完全可以替代matplotlib的。不过altair对中文的支持好像是不大好。
import altair as alt
import numpy as np
import pandas as pd
# Compute x^2 + y^2 across a 2D grid
x, y = np.meshgrid(range(-5, 5), range(-5, 5))
z = x ** 2 + y ** 2
# Convert this grid to columnar data expected by Altair
source = pd.DataFrame({'x': x.ravel(),
                     'y': y.ravel(),
                     'z': z.ravel()})
alt.Chart(source).mark_rect().encode(
    x='x:O',
    y='y:O',
    color='z:Q'
)
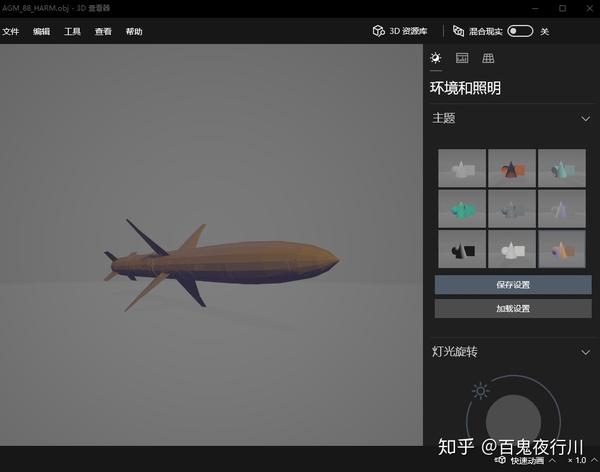
8、Python后处理by vispy
vispy是一个可交互的高性能可视化库。
VisPy is a Python library for interactive scientific visualization that is designed to be fast, scalable, and easy to use.
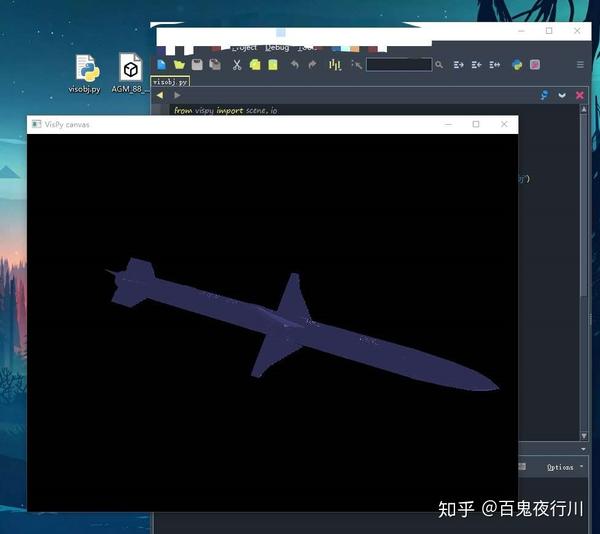
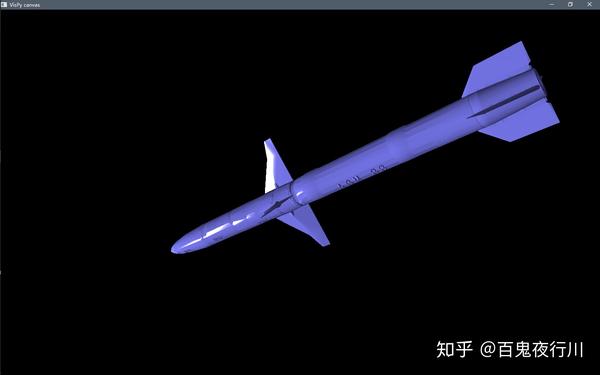
vispy同样是支持gpu的,同样具有渲染大量点云的能力。但是这里介绍这个函数库并不是为了讲渲染,而是介绍其打开几何文件的功能。这里以.obj文件为例子,会用之后就可以自己写一个控制台程序去查看几何文件了。
from vispy import scene, io
canvas = scene.SceneCanvas(keys='interactive', show=True)
view = canvas.central_widget.add_view()
verts, faces, normals, nothing = io.read_mesh("AGM_88_HARM.obj")
mesh = scene.visuals.Mesh(vertices=verts, faces=faces, shading='smooth')
view.add(mesh)
view.camera = scene.TurntableCamera()
view.camera.depth_value = 9
if __name__ == '__main__':
    canvas.app.run()
这里的.obj文件采用的是相对路径,如果是绝对路径的话有可能出现报错,这时候可以在路径前引号的前面加一个“r“,或者把路径的反斜杠改成两个反斜杠或者斜杠。


如果是自己要实现一个CFD的程序,并且需要三维的后处理,能在不依赖tecplot等外部程序的情况下做出这样的结果效果自然也是很不错的嘛。
如果有想要自己尝试,需要这里面的.obj文件的朋友可以找我通过邮箱或者百度网盘发送给你们,这里附件的操作太复杂我应该弄不了。
说明一下这个程序我是在python3.7的环境下运行的,我自己的电脑上无法安装python3.8的vispy,很可能是因为一些依赖的库的版本问题,所以现在使用python还是推荐安装3.7版本的anaconda。
9、Python后处理by vtk
vtk库真的是最强可视化处理库了,具体的很多用法可能要到可视化部分的最后我介绍完各种数据文件的结构后才能用上。
VTK是一个通用的数据格式的协议,具体我也说不太清,可以理解为和paraview是一家人。我这学期选修了一门生物医学相关的课程,人体测量那一节的作业就是我第一次在记事本里面手写.vtk文件后做的。
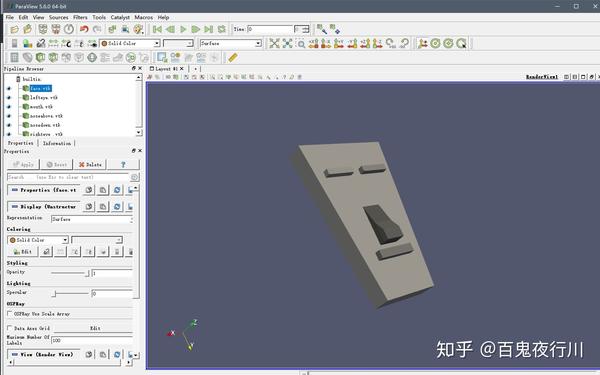

vtk库就是在VTK基础上的一个可调用函数包,而这里的介绍和vispy一样,用vtk打开一个.stl文件(其实很多有类似功能的函数库都需要vtk的存在)。
#encoding:utf-8
import vtk
def main():
    stlreader = vtk.vtkSTLReader()
    stlreader.SetFileName(r"\EF2000.STL")
    cylinderMapper = vtk.vtkPolyDataMapper() # ��Ⱦ����μ���
    cylinderMapper.SetInputConnection(stlreader.GetOutputPort()) # VTK���ӻ�����������
    cylinderActor = vtk.vtkActor()
    cylinderActor.SetMapper(cylinderMapper)
    renderer = vtk.vtkRenderer() # ��Ⱦ
    renderer.AddActor(cylinderActor)
    renderer.SetBackground(0.1, 0.2, 0.4)
    renWin = vtk.vtkRenderWindow() # ������ϵͳ��VTK��Ⱦ��������
    renWin.AddRenderer(renderer)
    renWin.SetSize(300, 300)
    iren = vtk.vtkRenderWindowInteractor() # ��������
    iren.SetRenderWindow(renWin)
    # �����������������ת���Ŵ���С�Ȳ���
    style = vtk.vtkInteractorStyleTrackballCamera()
    iren.SetInteractorStyle(style)
    iren.Initialize()
    iren.Start()
    del stlreader
    del cylinderMapper
    del cylinderActor