根据 onnxruntime-gpu, cuda, cudnn 三者对应关系,安装相应的 onnxruntime-gpu 即可。
pip install onnxruntime-gpu==1.6.0
在 conda 环境中安装,不依赖于 本地主机 上已安装的 cuda 和 cudnn 版本,灵活方便。这里,先说一下已经测试通过的组合:
- python3.6, cudatoolkit10.2.89, cudnn7.6.5, onnxruntime-gpu1.4.0
- python3.8, cudatoolkit11.3.1, cudnn8.2.1, onnxruntime-gpu1.14.1
如果需要其他的版本, 可以根据 onnxruntime-gpu, cuda, cudnn 三者对应关系自行组合测试。
下面,从创建conda环境,到实现在GPU上加速onnx模型推理进行举例。
conda create -n torch python=3.8
source activate torch
conda install pytorch==1.10.0 torchvision==0.11.0 torchaudio==0.10.0 cudatoolkit=11.3 -c pytorch -c conda-forge
conda install cudnn==8.2.1
pip install onnxruntime-gpu==1.14.1
-
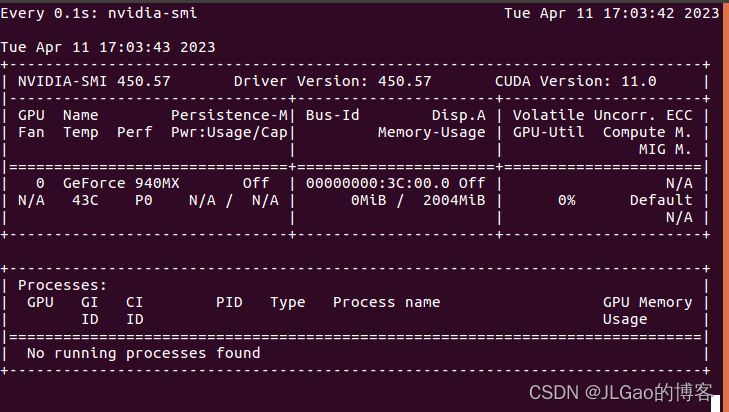
打开终端,输入 watch -n 0.1 nvidia-smi, 实时查看gpu使用情况
-
代码测试,摘取API
import numpy as np
import torch
import onnxruntime
MODEL_FILE = '.model.onnx'
DEVICE_NAME = 'cuda' if torch.cuda.is_available() else 'cpu'
DEVICE_INDEX = 0
DEVICE=f'{DEVICE_NAME}:{DEVICE_INDEX}'
def model():
class Model(torch.nn.Module):
def __init__(self):
super(Model, self).__init__()
def forward(self, x, y):
return x.add(y)
return Model()
def create_model(type: torch.dtype = torch.float32):
sample_x = torch.ones(3, dtype=type)
sample_y = torch.zeros(3, dtype=type)
torch.onnx.export(model(), (sample_x, sample_y), MODEL_FILE,
input_names=["x", "y"], output_names=["z"],
dynamic_axes={"x":{0 : "array_length_x"}, "y":{0: "array_length_y"}})
def create_session(model: str) -> onnxruntime.InferenceSession:
providers = ['CPUExecutionProvider']
if torch.cuda.is_available():
providers.insert(0, 'CUDAExecutionProvider')
return onnxruntime.InferenceSession(model, providers=providers)
def run(x: np.array, y: np.array) -> np.array:
session = create_session(MODEL_FILE)
z = session.run(["z"], {"x": x, "y": y})
return z[0]
def run_with_data_on_device(x: np.array, y: np.array) -> onnxruntime.OrtValue:
session = create_session(MODEL_FILE)
x_ortvalue = onnxruntime.OrtValue.ortvalue_from_numpy(x, DEVICE_NAME, DEVICE_INDEX)
y_ortvalue = onnxruntime.OrtValue.ortvalue_from_numpy(y, DEVICE_NAME, DEVICE_INDEX)
io_binding = session.io_binding()
io_binding.bind_input(name='x', device_type=x_ortvalue.device_name(), device_id=0, element_type=x.dtype, shape=x_ortvalue.shape(), buffer_ptr=x_ortvalue.data_ptr())
io_binding.bind_input(name='y', device_type=y_ortvalue.device_name(), device_id=0, element_type=y.dtype, shape=y_ortvalue.shape(), buffer_ptr=y_ortvalue.data_ptr())
io_binding.bind_output(name='z', device_type=DEVICE_NAME, device_id=DEVICE_INDEX, element_type=x.dtype, shape=x_ortvalue.shape())
session.run_with_iobinding(io_binding)
z = io_binding.get_outputs()
return z[0]
def main():
create_model()
t1 = time.time()
print(run(x=np.float32([1.0, 2.0, 3.0]),y=np.float32([4.0, 5.0, 6.0])))
t2 = time.time()
print(run_with_data_on_device(x=np.float32([1.0, 2.0, 3.0, 4.0, 5.0]), y=np.float32([1.0, 2.0, 3.0, 4.0, 5.0])).numpy())
t3 = time.time()
print(f'Done. ({(1E3 * (t2 - t1)):.1f}ms) Inference.')
print(f'Done. ({(1E3 * (t3 - t2)):.1f}ms) Inference.')
if __name__ == "__main__":
main()
模型部署入门系列教程持续更新啦,在前两期教程中,我们学习了PyTorch 模型转 ONNX 模型的方法,了解了如何在原生算子表达能力不足时,为 PyTorch 或 ONNX 自定义算子。一直以来,我们都是通过 PyTorch 来导出 ONNX 模型的,基本没有单独探究过 ONNX 模型的构造知识。
不知道大家会不会有这样一些疑问:ONNX 模型在底层是用什么格式存储的?如何不依赖深度学习框架,只用 ONNX 的 API 来构造一个 ONNX 模型?如果没有源代码,只有一个 ONNX 模型,该如何对这个模型.
前几天使用了LibTorch对
模型进行C++转换和
测试,发现速度比原始
Python的
Pytorch模型提升了2倍。现在尝试以下另一种跨平台的
模型转换方式——
Onnx,可实现跨X86/ARM架构的迁移应用。
本文主要介绍C++版本的
onnxruntime使用,
Python的操作较容易就不再提及了。
一、克隆及编译
git clone --recursive https://github.com/Microsoft/
onnxruntime
cd
onnxruntime/
git checkout v1.8.0
心比天高,仗剑走天涯,保持热爱,奔赴向梦想!低调,谦虚,自律,反思,成长,还算是比较正能量的博主,公益免费传播……内心特别想在AI界做出一些可以推进历史进程影响力的东西(兴趣使然,有点小情怀,也有点使命感呀)……
05-13
sudo apt-get update
sudo apt-get install -y git cmake build-essential libprotobuf-dev protobuf-compiler libprotobuf-dev libprotoc-dev libopencv-dev
3. 克隆
onnxruntime-
gpu仓库:
git clone --recursive https://github.com/microsoft/
onnxruntime.git
4. 进入
onnxruntime目录:
cd
onnxruntime
5. 创建build目录并进入:
mkdir build
cd build
6. 配置编译选项:
cmake .. -DCMAKE_BUILD_TYPE=Release -DCMAKE_INSTALL_PREFIX=/usr/local -D
onnxruntime_USE_CUDA=ON -D
onnxruntime_CUDA_HOME=/usr/local/cuda -D
onnxruntime_CUDA_INCLUDE_DIRS=/usr/local/cuda/include -D
onnxruntime_CUDA_LIB_DIRS=/usr/local/cuda/lib64 -D
onnxruntime_USE_TENSORRT=OFF
其中,-D
onnxruntime_USE_CUDA=ON表示使用CUDA,-D
onnxruntime_CUDA_HOME、-D
onnxruntime_CUDA_INCLUDE_DIRS、-D
onnxruntime_CUDA_LIB_DIRS分别指定CUDA的
安装路径和头文件路径、库文件路径。
7. 编译并
安装:
make -j$(nproc)
sudo make install
这里使用了make -j$(nproc)来并行编译,可以加快编译速度。
8.
安装完毕后,可以
测试一下
onnxruntime-
gpu是否正常工作:
cd ../tools/ci_build/github/linux/docker/scripts
./run_
onnx_tests.sh -e
gpu
如果
测试通过,则说明
onnxruntime-
gpu已经
安装成功了。
注意:
onnxruntime-
gpu的
安装可能会因为各种原因失败,需要根据具体错误信息进行调试。

