dtparam=i2c_arm=on
dtoverlay=WS_xinchDSI_Screen,SCREEN_type=6,I2C_bus=10
dtoverlay=WS_xinchDSI_Touch,I2C_bus=10,invertedx,invertedy
I have a display with a DSI interface and this is probably the problem.
In this thread there is information that Peppymeter works with smaller DSI displays: 4.3" 800x400 and 5" 800x480.
What could be the reason it doesn’t work with 11.9" 1480x320?
I managed to run Peppymeter (on 1480x320 display) with the resolution: small (320x240) and medium(480x320).
Additionally, I noticed that at these resolutions it only works after restarting Volumio. Setting a different resolution and back to small and medium causes Peppymeter to no longer work.
I tried to run the 1480x320 resolution from the created custom_7 (1480x320) directory and from custom_5 (1920x480) with uploaded 1480x320 files (according to Gelo5 instructions).
After manually starting with 1480x320 resolution:
export DISPLAY=:0
python3 volumio_peppymeter.py
I get a message:
volumio@volumio:/data/plugins/miscellanea/peppy_screensaver/peppymeter$ python3 volumio_peppymeter.py
pygame 1.9.4.post1
Hello from the pygame community.
Contribute - pygame wiki
Traceback (most recent call last):
File “volumio_peppymeter.py”, line 113, in
pm.init_display()
File “/data/plugins/miscellanea/peppy_screensaver/peppymeter/peppymeter.py”, line 121, in init_display
screen_w = self.util.meter_config[SCREEN_INFO][WIDTH]
KeyError: ‘width’
Any ideas?
Update:
I noticed that in the file /data/plugins/miscellanea/peppy_screensaver/peppymeter/config.txt in the field [current] values for width and height are empty:
meter = Gelo5_Technics
random.meter.interval = 15
meter.size = custom_7 (1480x320)
screen.width =
screen.height =
After manual completion:
screen.width = 1480
screen.height = 320
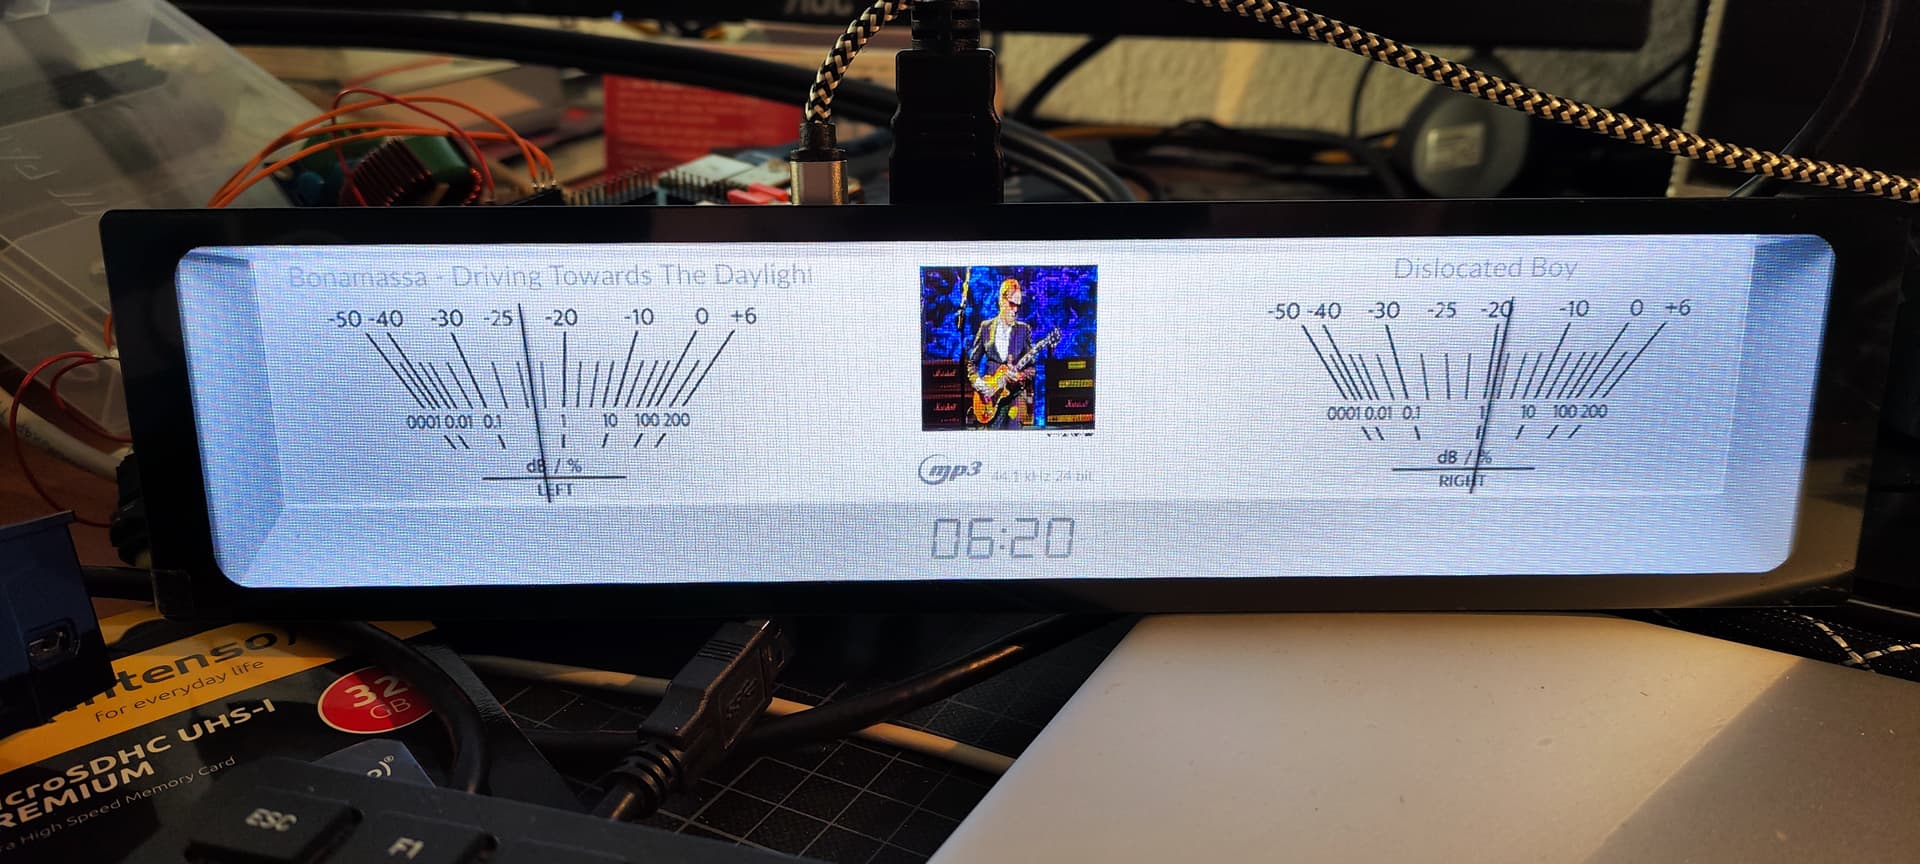
and restarting Volumio finally Peppymeter worked in 1480x320 resolution!
However, any change to the Peppymeter settings clears the resolution and you must re-enter them manually and restart Volumio again.
Hi 2aCD
Thanks for yours and members invaluable help that we can enjoy beauty of peppymeter.
I have a question to ask in relation to peppymeter and Spotify.
I have installed peppymeter as well as spotify in volumio.
The issue is that the VU meter does not move in spotify
You have documented the solution, but I am a dummy as to how to affect the changes.
Maybe to help me alot, you can share and teach me how to open the file as stated below by you :
open the file:
/data/plugins/music_service/spop/spop.conf.tmpl
/etc/spopd.conf
and change in both files the output_name to peppyalsa
And then also how to change the below.
[sox]
output_type = alsa
#output_name
= ${outdev}
output_name = peppyalsa
have you tried to set in playback-options/volume option - mixer type to software/hardware or to none.
or in peppymeter plugin, set alsa configuration to DSD native and check if the meters are moving now.
or if you use Fusion DSP plugin it will not work with peppymeter.
or ssh in volumio and set output device, whether this is still current and still works I don’t know.
location file:
/data/plugins/music_service/spop/volspotify.tmpl
Project with PeppyMeter Screensaver Plugin for VOLUMIO v2.9xx and 3.0xx buster
Volumio Development
Hi michel8166,
for spotify I have create separat entrypoint in alsa.conf from peppymeter. Please search the template from volspotconnect2. I think its placed in:
/data/plugins/music_service/volspotconnect2/volspotify.tmpl
replace in section output
[output]
device = '${outdevice}'
[output]
device = 'peppyalsa'
Then change the mixertype or outputdevice to another value and revert it back to create a new config file from templ.
I think that should work
Best regards
The Local / AUX switch is to select input source for internal amp.
Local : Rpi (DAC)
AUX : external analog audio (RCA), ex. CDP, TV…
The PeppyMter is only working with local source.
Hi Michel
I tried to ‘second guess’ the instructions given to you by 2aCD but I still don’t really know how to go about executing them.
For instance what is the command to type in ssh (I am assuming the commands has to be executed in ssh) to arrive at :
Step 1
/data/plugins/music_service/volspotconnect2/volspotify.tmpl
Subsequently what should I type in ssh to achieve :
Step 2
replace in section output [output] device = ‘${outdevice}’ with [output] device = ‘peppyalsa’
Lastly, this portion too, what command to type :
Step 3
Then change the mixertype or outputdevice to another value and revert it back to create a new config file from temp.
Hope you can help . Thanks John
@JohnSnowLow
you must first enable ssh and only then can you adjust the line via terminal.
then connect to your streamer, for example ssh
volumio@192.168.5.6
…password is volumio.
After ssh enabled type and adjust.
sudo nano /data/plugins/music_service/volspotconnect2/volspotify.tmpl
Safe is control X and y (Yes)
okay, once you are ssh logged in to volumio you can enter the command and then follow the instructions from the link.
command:
sudo nano /data/plugins/music_service/volspotconnect2/volspotify.tmpl
Project with PeppyMeter Screensaver Plugin for VOLUMIO v2.9xx and 3.0xx buster
Volumio Development
Hi michel8166,
for spotify I have create separat entrypoint in alsa.conf from peppymeter. Please search the template from volspotconnect2. I think its placed in:
/data/plugins/music_service/volspotconnect2/volspotify.tmpl
replace in section output
[output]
device = '${outdevice}'
[output]
device = 'peppyalsa'
Then change the mixertype or outputdevice to another value and revert it back to create a new config file from templ.
I think that should work
Best regards
@Gelo5
Thanks for the great work and creating the different skins for the displays.
My Waveshare 11.9 inch 1480 x 320 display is running.
The easiest way is via the HDMI connection.
Now I can finish the case and the front panel.