



你需要知道的单页面路由实现原理


前言
最近开发的埋点项目,需要记录用户行为轨迹即用户页面访问顺序。需要在页面跳转的时候,记录用户访问的信息(比如 url ,请求头部等),非单页面应用可以给 window 对象加上一个 beforeunload 事件,在页面离开时触发采集开关,但是现在很多业务是单页面应用,用户切换地址的时候,是无刷新的局部更新,没有办法触发 beforeunload。所以单页面应用的路由插件一定运用了 window 自带的无刷新修改用户浏览记录的方法,pushState 和 replaceState。
pushState 和 replaceState 了解一下
history 提供了两个方法,能够无刷新的修改用户的浏览记录,pushSate,和 replaceState,区别的 pushState 在用户访问页面后面添加一个访问记录, replaceState 则是直接替换了当前访问记录
history 对象的详细信息已经有很多很好很详细的介绍文献,这里不再做总结,我们引用阮老师的教程介绍, history对象 – JavaScript 标准参考教程(alpha)
history.pushState
history.pushState方法接受三个参数,依次为:
state:一个与指定网址相关的状态对象,popstate事件触发时,该对象会传入回调函数。如果不需要这个对象,此处可以填null。
title:新页面的标题,但是所有浏览器目前都忽略这个值,因此这里可以填null。
url:新的网址,必须与当前页面处在同一个域。浏览器的地址栏将显示这个网址。
假定当前网址是http://example.com/1.html,我们使用pushState方法在浏览记录(history对象)中添加一个新记录。
   var stateObj = { foo: 'bar' };
    history.pushState(stateObj, 'page 2', '2.html');
添加上面这个新记录后,浏览器地址栏立刻显示 http://example.com/2.html,但并不会跳转到 2.html,甚至也不会检查2.html 是否存在,它只是成为浏览历史中的最新记录。这时,你在地址栏输入一个新的地址(比如访问 http:// google.com ),然后点击了倒退按钮,页面的 URL 将显示 2.html;你再点击一次倒退按钮,URL 将显示 1.html。
总之,pushState 方法不会触发页面刷新,只是导致 history 对象发生变化,地址栏会有反应。
如果 pushState 的 url参数,设置了一个新的锚点值(即hash),并不会触发 hashchange 事件。如果设置了一个跨域网址,则会报错。
   // 报错
    history.pushState(null, null, 'https://twitter.com/hello');
    上面代码中,pushState想要插入一个跨域的网址,导致报错。这样设计的目的是,防止恶意代码让用户以为他们是在另一个网站上。
history.replaceState
history.replaceState 方法的参数与 pushState 方法一模一样,区别是它修改浏览历史中当前纪录,假定当前网页是 http://example.com/example.html。
   history.pushState({page: 1}, 'title 1', '?page=1');
    history.pushState({page: 2}, 'title 2', '?page=2');
    history.replaceState({page: 3}, 'title 3', '?page=3');
    history.back()
    // url显示为http://example.com/example.html?page=1
    history.back()
    // url显示为http://example.com/example.html
    history.go(2)
    // url显示为http://example.com/example.html?page=3
单页面应用用户访问轨迹埋点
开发过单页面应用的同学,一定比较清楚,单页面应用的路由切换是无感知的,不会重新进行 http 请求去获取页面,而是通过改变页面渲染视图来实现。所以他的实现原理一定也是通过原生的 pushState 或则 replaceState 来实现的。所以在页面跳转的时候一定会调用 pushState 或则 replaceState ,要记录用户的跳转信息,我们只要拦截 pushState 和 replaceState,在执行默行为 前 先执行我们的方法就能够采集到用户的跳转信息了
   // 改写思路:拷贝 window 默认的 replaceState 函数,重写 history.replaceState 在方法里插入我们的采集行为,在重写的 replaceState 方法最后调用,window 默认的 replaceState 方法
    collect = {}
    collect.onPushStateCallback : function(){}  // 自定义的采集方法
    (function(history){
        var replaceState = history.replaceState;   // 存储原生 replaceState
        history.replaceState = function(state, param) {     // 改写 replaceState
           var url = arguments[2];
           if (typeof collect.onPushStateCallback == "function") {
                 collect.onPushStateCallback({state: state, param: param, url: url});   //自定义的采集行为方法
           return replaceState.apply(history, arguments);    // 调用原生的 replaceState
     })(window.history);
vue-router 的路由实现
既然知道了这个原理,我们来看下 vue-router 的实现,我们打开 vue-router 项目地址 ,把项目克隆下来,或则直接在 github 上预览,在 Vue 开发的项目里,我们通过 router.push(‘home’) 来实现页面的跳转,所以我们检索下,push 方法的实现

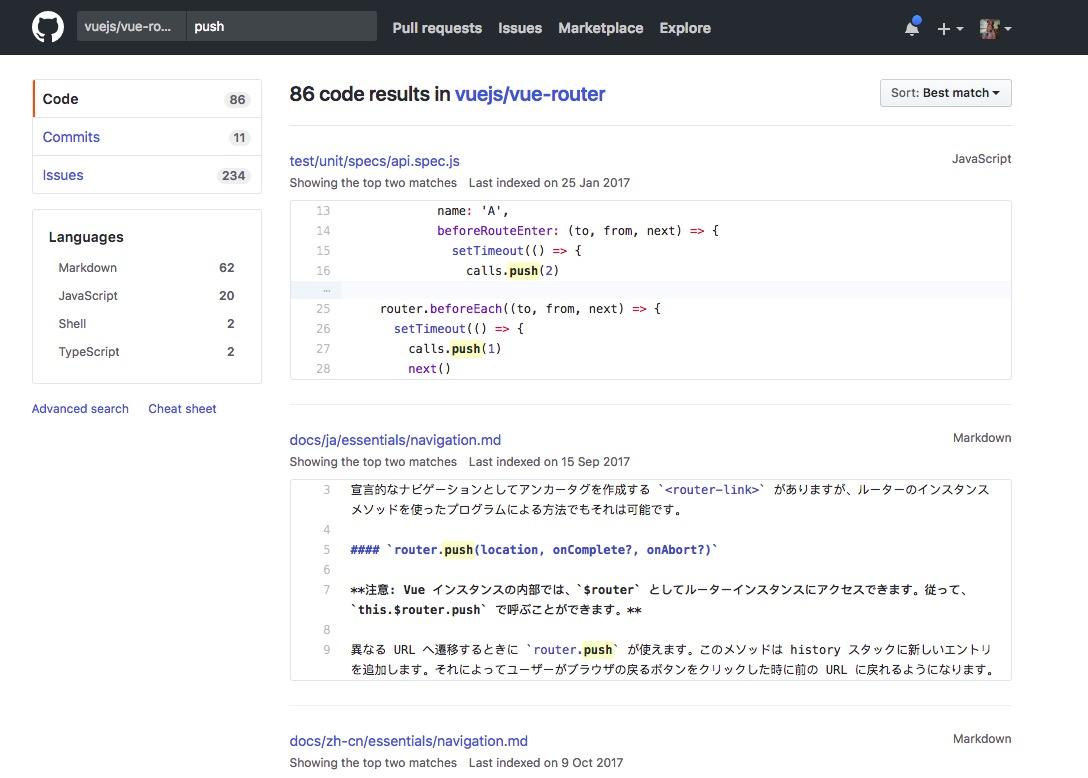
我们检索到了 20 个 js 文件, ,一般到这个时候,我们会放弃源码阅读,那么我们今天的文章就到这结束,谢谢大家!
开个玩笑,源码阅读不能这么粗糙,我们找到 src 目录,点开
index.js
文件,看到 history对象的定义和 mode 参数有关
if (!inBrowser) {
      mode = 'abstract'
    this.mode = mode
    switch (mode) {
      case 'history':
        this.history = new HTML5History(this, options.base)
        break
      case 'hash':
        this.history = new HashHistory(this, options.base, this.fallback)
        break
      case 'abstract':
        this.history = new AbstractHistory(this, options.base)
        break
      default:
        if (process.env.NODE_ENV !== 'production') {
          assert(false, `invalid mode: ${mode}`)
看到 history 对象的实例与配置的 mode 有关,vue-router 通过3中方式实现了路由切换。与我们今天讲的内容相匹配的是
HTML5History
的实现方案,其他的将不再文章中做扩展,若果你感兴趣想要了解,可以看文章后面的扩展阅读
我们来看 vue-router 中的 HTML5History 源码:
   push (location: RawLocation, onComplete?: Function, onAbort?: Function) {
      const { current: fromRoute } = this
      this.transitionTo(location, route => {
        pushState(cleanPath(this.base + route.fullPath))
        handleScroll(this.router, route, fromRoute, false)
        onComplete && onComplete(route)
      }, onAbort)
    replace (location: RawLocation, onComplete?: Function, onAbort?: Function) {
      const { current: fromRoute } = this
      this.transitionTo(location, route => {
        replaceState(cleanPath(this.base + route.fullPath))
        handleScroll(this.router, route, fromRoute, false)
        onComplete && onComplete(route)
      }, onAbort)
    // src/util/push-state.js
    export function pushState (url?: string, replace?: boolean) {
      saveScrollPosition()
      // try...catch the pushState call to get around Safari
      // DOM Exception 18 where it limits to 100 pushState calls
      const history = window.history
      try {
        if (replace) {
          history.replaceState({ key: _key }, '', url)
        } else {
          _key = genKey()
          history.pushState({ key: _key }, '', url)
      } catch (e) {
        window.location[replace ? 'replace' : 'assign'](url)