让图表看起来比较美观是图表 配色 最末的目的,配色最核心的目标是为你的数据集找到一个好的表达。

对于任何给定的数据集,最佳的配色取决于许多因素,包括:

  • 表现形式或者度量数据。
  • 你对数据集的理解(如:是否有一个偏离其它值的临界值?)
  • 如果你正在绘制的参数(变量本身)有一个直观的配色方案
  • 如果在这个领域有一个标准(行业配色标准或习惯),读者可能会期待

对于许多应用程序,感知上一致的配色是最佳选择。如,数据中的相同步幅被视为颜色空间中的相同步幅(色彩间的变化反映了数据的变化)。

感知 是观众对不同颜色、或不同颜色组合的情感反应。

matplotlib提供了三个模块用于对图表的颜色进行操控:

  1. matplotlib.cm
  2. matplotlib.colorbar
  3. matplotlib.colors

在matplotlib中,有三种给图表配色的方法:

  1. 直观的指定颜色,如,在对象的参数中指定, color='red'
  2. 使用colormap,将数据映射为颜色模型。 注意,需要支持 cmap 参数的图表类型
  3. 通过y值,使用蒙版数组按y值绘制具有不同颜色的线。

前面的文章已详细介绍了 方法1、2,下面用一个示例介绍方法3。

使用masked arrays组线条着不同的颜色

%matplotlib inline
import numpy as np
import matplotlib.pyplot as plt
t = np.arange(0.0, 2.0, 0.01)
s = np.sin(2 * np.pi * t)
upper = 0.77
lower = -0.77
supper = np.ma.masked_where(s < upper, s)
slower = np.ma.masked_where(s > lower, s)
smiddle = np.ma.masked_where((s < lower) | (s > upper), s)
fig, ax = plt.subplots()
ax.plot(t, smiddle, t, slower, t, supper)
plt.show()
%matplotlib inline
import numpy as np
import matplotlib.pyplot as plt
t = np.arange(0.0, 2.0, 0.01)
s = np.sin(2 * np.pi * t)
upper =0.75
lower = 1.75
supper = np.ma.masked_where(t < upper, s)
slower = np.ma.masked_where(t > lower, s)
smiddle = np.ma.masked_where((t < lower) | (t > upper), t)
fig, ax = plt.subplots()
ax.plot(t, smiddle, t, slower, t, supper)
plt.show()

matplotlib内置的colormap

matplotlib内置了7类colormap,用于不同的场景:

  1. Perceptually Uniform Sequential
  2. Sequential
  3. Sequential2
  4. Diverging
  5. Cyclic
  6. Qualitative
  7. Miscellaneous

Perceptually Uniform Sequential

Sequential,顺序排列的,连续、有序的。

明度、亮度的变化,通常是颜色的饱和度逐渐增加,经常使用单一的色相;适合用于表示具有顺序的信息。

"Perceptually Uniform Sequential"类colormap提供了5种数值到颜色的映射序列,左边是亮度较低(亮度较暗的色相),右边则是较亮的色相。

cmaps['Perceptually Uniform Sequential'] = [
            'viridis', 'plasma', 'inferno', 'magma', 'cividis']
from colorspacious import cspace_convert
# sphinx_gallery_thumbnail_number = 2
import numpy as np
import matplotlib as mpl
import matplotlib.pyplot as plt
from matplotlib import cm
from colorspacious import cspace_converter
from collections import OrderedDict
cmaps = OrderedDict()
cmaps['Perceptually Uniform Sequential'] = [
            'viridis', 'plasma', 'inferno', 'magma', 'cividis']
nrows = max(len(cmap_list) for cmap_category, cmap_list in cmaps.items())
gradient = np.linspace(0, 1, 256)
gradient = np.vstack((gradient, gradient))
def plot_color_gradients(cmap_category, cmap_list, nrows):
    fig, axes = plt.subplots(nrows=nrows)
    fig.subplots_adjust(top=0.95, bottom=0.01, left=0.2, right=0.99)
    axes[0].set_title(cmap_category + ' colormaps', fontsize=14)
    for ax, name in zip(axes, cmap_list):
        ax.imshow(gradient, aspect='auto', cmap=plt.get_cmap(name))
        pos = list(ax.get_position().bounds)
        x_text = pos[0] - 0.01
        y_text = pos[1] + pos[3]/2.
        fig.text(x_text, y_text, name, va='center', ha='right', fontsize=10)
    # Turn off *all* ticks & spines, not just the ones with colormaps.
    for ax in axes:
        ax.set_axis_off()
for cmap_category, cmap_list in cmaps.items():
    plot_color_gradients(cmap_category, cmap_list, nrows)
plt.show()
print(cmaps)

OrderedDict([('Perceptually Uniform Sequential', ['viridis', 'plasma', 'inferno', 'magma', 'cividis'])])

获取colormap颜色信息

以RGB颜色为例,colormap每个映射使用一个(256,3),即256行,3列的array存储颜色信息。每行代表colormap映射条上的一个点。

可以使用下面的代码读取cmp的颜色信息:

#读取cmp单个点的颜色的RGB值
from matplotlib import cm
def get_pcv(cn,r):
    #cn是cmap实例,例如 cn = cm.viridis, cm=cm.jet
    #r是行号,整数,如12
    print(cn(r)[0],cn(r)[1],cn(r)[


2])
    #转换为256色表示的整数
    print(int(cn(r)[0]*255.0),int(cn(r)[1]*255.0),int(cn(r)[2]*255.0)) 
piyg_l = [x for x in cm.PiYG._segmentdata['green']]
def prc(cmap):
    for y in cmap:
        for l in y:
            print(l*255)
prc(piyg_l)
#print(len(piyg_l))
#print(piyg_l)
119.0
119.0
76.50000000000001
182.0
182.0
102.0
224.0
224.0
127.5
247.0
247.0
153.00000000000003
245.0
245.0
178.50000000000003
225.0
225.0
204.0
188.0
188.0
229.5
146.0
146.0
255.0
100.0
100.0
bwr_l = [x*255 for x in cm.bwr._segmentdata['green'][2]]
print(len(bwr_l))
print(bwr_l)
[255.0, 0.0, 0.0]
get_pcv(cm.viridis,0)
0.267004 0.004874 0.329415
68 1 84

每个colormap实例都有一个name属性,返回映射的名称。

from matplotlib import cm
cn = cm.viridis
cn.name
'viridis'

获取colormap实例的映射值

如此众多的colormaps,使用下面的代码,可以将这些colormap中具体的数值导出来,以供更深入地研究、更灵活地使用。

#获取colormap实例的映射值
from matplotlib import cm
def get_cmv(cn):
    #cn是colormap的实例,如cm.viridis, cm.jet等
    import numpy as np
    #创建全部为0的(256,3)的数组
    colormap_int = np.zeros((256, 3), np.uint8)
    colormap_float = np.zeros((256, 3), np.float)
    #将每个点值读取,存入上面的数组
    for i in range(0, 256, 1):
       colormap_float[i, 0] = cn(i)[0]
       colormap_float[i, 1] = cn(i)[1]
       colormap_float[i, 2] = cn(i)[2]
       colormap_int[i, 0] = np.int_(np.round(cn(i)[0] * 255.0))
       colormap_int[i, 1] = np.int_(np.round(cn(i)[1] * 255.0))
       colormap_int[i, 2] = np.int_(np.round(cn(i)[2] * 255.0))
    #将数组保存到txt文件 
    np.savetxt(str(cn.name)+"_float.txt", colormap_float, fmt = "%f", delimiter = ' ', newline = '\n')
    np.savetxt(str(cn.name)+"_int.txt", colormap_int, fmt = "%d", delimiter = ' ', newline = '\n')
    #打印相关信息 
    #print(colormap_int)
    print(colormap_int.shape)
    print(colormap_int)
    return
#调用get_cmv()函数,提供colormap实例作为参数
get_cmv(cm.viridis)
(256, 3)
[[ 68   1  84]
 [ 68   2  86]
 [ 69   4  87]
 [ 69   5  89]
 [ 70   7  90]
 [ 70   8  92]
 [ 70  10  93]
 [ 70  11  94]
 [ 71  13  96]
 [ 71  14  97]
 [ 71  16  99]
 [ 71  17 100]
 [ 71  19 101]
 [ 72  20 103]
 [ 72  22 104]
 [ 72  23 105]
 [ 72  24 106]
 [ 72  26 108]
 [ 72  27 109]
 [ 72  28 110]
 [ 72  29 111]
 [ 72  31 112]
 [ 72  32 113]
 [ 72  33 115]
 [ 72  35 116]
 [ 72  36 117]

Sequential,

对于序列图,亮度值通过颜色图单调增加。

colormaps中的一些 L 中是近线性的,而其他的则是较为弯曲的。

Sequential类colormap有如下特性:

  • 通常是单一色相的亮度变化;
  • 亮度值变化范围从0到100;
  • 有些是线性变化的,有些则是曲线的;
  • 同一色相有亮度变化,不同色相之间的亮度不同。
# sphinx_gallery_thumbnail_number = 2
import numpy as np
import matplotlib as mpl
import matplotlib.pyplot as plt
from matplotlib import cm
from colorspacious import cspace_converter
from collections import OrderedDict
cmaps = OrderedDict()
cmaps['Sequential'] = [
            'Greys', 'Purples', 'Blues', 'Greens', 'Oranges', 'Reds',
            'YlOrBr', 'YlOrRd', 'OrRd', 'PuRd', 'RdPu', 'BuPu',
            'GnBu', 'PuBu', 'YlGnBu', 'PuBuGn', 'BuGn', 'YlGn']
nrows = max(len(cmap_list) for cmap_category, cmap_list in cmaps.items())
gradient = np.linspace(0, 1, 256)
gradient = np.vstack((


gradient, gradient))
for cmap_category, cmap_list in cmaps.items():
    plot_color_gradients(cmap_category, cmap_list, nrows)
plt.show()
print(cmaps)
OrderedDict([('Sequential', ['Greys', 'Purples', 'Blues', 'Greens', 'Oranges', 'Reds', 'YlOrBr', 'YlOrRd', 'OrRd', 'PuRd', 'RdPu', 'BuPu', 'GnBu', 'PuBu', 'YlGnBu', 'PuBuGn', 'BuGn', 'YlGn'])])

Sequential2

Sequential2类别中许多颜色映射模型的 L 函数中有纽结。在平稳或扭结的colormap区域中表示的数据将在colormap的这些值处导致数据条带的感觉。

# sphinx_gallery_thumbnail_number = 2
import numpy as np
import matplotlib as mpl
import matplotlib.pyplot as plt
from matplotlib import cm
from colorspacious import cspace_converter
from collections import OrderedDict
cmaps = OrderedDict()
cmaps['Sequential (2)'] = [
            'binary', 'gist_yarg', 'gist_gray', 'gray', 'bone', 'pink',
            'spring', 'summer', 'autumn', 'winter', 'cool', 'Wistia',
            'hot', 'afmhot', 'gist_heat', 'copper']
nrows = max(len(cmap_list) for cmap_category, cmap_list in cmaps.items())
gradient = np.linspace(0, 1, 256)
gradient = np.vstack((gradient, gradient))
for cmap_category, cmap_list in cmaps.items():
    plot_color_gradients(cmap_category, cmap_list, nrows)
plt.show()
print(cmaps)
OrderedDict([('Sequential (2)', ['binary', 'gist_yarg', 'gist_gray', 'gray', 'bone', 'pink', 'spring', 'summer', 'autumn', 'winter', 'cool', 'Wistia', 'hot', 'afmhot', 'gist_heat', 'copper'])])

Diverging 发散

对于 Diverging 映射,我们希望 import matplotlib.pyplot as plt from matplotlib import cm from colorspacious import cspace_converter from collections import OrderedDict cmaps = OrderedDict() cmaps['Diverging'] = [ 'PiYG', 'PRGn', 'BrBG', 'PuOr', 'RdGy', 'RdBu', 'RdYlBu', 'RdYlGn', 'Spectral', 'coolwarm', 'bwr', 'seismic'] nrows = max(len(cmap_list) for cmap_category, cmap_list in cmaps.items()) gradient = np.linspace(0, 1, 256) gradient = np.vstack((gradient, gradient)) for cmap_category, cmap_list in cmaps.items(): plot_color_gradients(cmap_category, cmap_list, nrows) plt.show()

print(cmaps)
OrderedDict([('Diverging', ['PiYG', 'PRGn', 'BrBG', 'PuOr', 'RdGy', 'RdBu', 'RdYlBu', 'RdYlGn', 'Spectral', 'coolwarm', 'bwr', 'seismic'])])

Cyclic 循环的

对于循环的映射,我们希望以相同的颜色开始和结束,并在中间遇到一个对称的中心点。 L 值在整个颜色映射中变化很大,因此对于表示供观看者感知的数据而言,这是一个糟糕的选择。请在 mycarta-jet上查看有关此想法的扩展。

# sphinx_gallery_thumbnail_number = 2
import numpy as np
import matplotlib as mpl
import matplotlib.pyplot as plt
from matplotlib import cm
from colorspacious import cspace_converter
from collections import OrderedDict
cmaps = OrderedDict()
cmaps['Cyclic'] = ['twilight', 'twilight_shifted', 'hsv']
nrows = max(len(cmap_list) for cmap_category, cmap_list in cmaps.items())
gradient = np.linspace(0, 1, 256)
gradient = np.vstack((gradient, gradient))
for cmap_category, cmap_list in cmaps.items():
    plot_color_gradients(cmap_category, cmap_list, nrows)
plt.show()
print(cmaps)
OrderedDict([('Cyclic', ['twilight', 'twilight_shifted', 'hsv'])])

Qualitative 定性

定性的 colormaps import matplotlib.pyplot as plt from matplotlib import cm from colorspacious import cspace_converter from collections import OrderedDict cmaps = OrderedDict() cmaps['Qualitative'] = ['Pastel1', 'Pastel2', 'Paired', 'Accent', 'Dark2', 'Set1', 'Set2', 'Set3', 'tab10', 'tab20', 'tab20b', 'tab20c'] nrows = max(len(cmap_list) for cmap_category, cmap_list in cmaps.items()) gradient = np. linspace(0, 1, 256) gradient = np.vstack((gradient, gradient)) for cmap_category, cmap_list in cmaps.items(): plot_color_gradients(cmap_category, cmap_list, nrows) plt.show()

print(cmaps)
OrderedDict([('Qualitative', ['Pastel1', 'Pastel2', 'Paired', 'Accent', 'Dark2', 'Set1', 'Set2', 'Set3', 'tab10', 'tab20', 'tab20b', 'tab20c'])])

Miscellaneous 杂项

一些杂项 colormaps 有其特定用途。例如,gist_earth, ocean, and terrain 似乎都是为一起绘制地形 topography (green/brown) 和水深 (blue) 而创建的。我们期望在这些 colormaps 看到一个(气流或海洋的)分开处, 然而,但是在gist_earth和地形中,多种扭结可能不是最理想的。创建CMRmap是为了很好地转换为灰度。尽管它在 L值在整个colormap中变化很大,这使得它成为一个糟糕的选择,不能代表查看者能够感知到的数据。在mycarta-jet可以看到这个想法的扩展。

# sphinx_gallery_thumbnail_number = 2
import numpy as np
import matplotlib as mpl
import matplotlib.pyplot as plt
from matplotlib import cm
from colorspacious import cspace_converter
from collections import OrderedDict
cmaps = OrderedDict()
cmaps['Miscellaneous'] = [
            'flag', 'prism', 'ocean', 'gist_earth', 'terrain', 'gist_stern',
            'gnuplot', 'gnuplot2', 'CMRmap', 'cubehelix', 'brg',
            'gist_rainbow', 'rainbow', 'jet', 'nipy_spectral', 'gist_ncar']
nrows = max(len(cmap_list) for cmap_category, cmap_list in cmaps.items())
gradient = np.linspace(0, 1, 256)
gradient = np.vstack((gradient, gradient))
for cmap_category, cmap_list in cmaps.items():
    plot_color_gradients(cmap_category, cmap_list, nrows)
plt.show()
print(cmaps)
OrderedDict([('Miscellaneous', ['flag', 'prism', 'ocean', 'gist_earth', 'terrain', 'gist_stern', 'gnuplot', 'gnuplot2', 'CMRmap', 'cubehelix', 'brg', 'gist_rainbow', 'rainbow', 'jet', 'nipy_spectral', 'gist_ncar'])])

colormap可用的映射名称

内置的映射名称

matplotlib内置了7类,82种颜色映射,每种颜色映射又有一个反向映射,共164种。

当使用cm.get_cmap(name)方法返回内置的colormap实例时,如果name参数不在内置的映射中,就会触发如下错误,并提示可用的名称:

ValueError: Colormap NoNmae is not recognized. Possible values are: 

下面的代码就会触发上述错误:

%matplotlib inline
import matplotlib as mpl
cmap = mpl.cm.get_cmap('noname')

可用的名称值有:

123456
AccentAccent_rBluesBlues_rBrBGBrBG_r
BuGnBuGn_rBuPuBuPu_rCMRmapCMRmap_r
Dark2Dark2_rGnBuGnBu_rGreensGreens_r
GreysGreys_rOrRdOrRd_rOrangesOranges_r
PRGnPRGn_rPairedPaired_rPastel1Pastel1_r
Pastel2Pastel2_rPiYGPiYG_rPuBuPuBuGn
PuBuGn_rPuBu_rPuOrPuOr_rPuRdPuRd_r
PurplesPurples_rRdBuRdBu_rRdGyRdGy_r
RdPuRdPu_rRdYlBuRdYlBu_rRdYlGnRdYlGn_r
RedsReds_rSet1Set1_rSet2Set2_r
Set3Set3_rSpectralSpectral_rWistiaWistia_r
YlGnYlGnBuYlGnBu_rYlGn_rYlOrBrYlOrBr_r
YlOrRdYlOrRd_rafmhotafmhot_rautumnautumn_r
binarybinary_rbonebone_rbrgbrg_r
bwrbwr_rcividiscividis_rcoolcool_r
coolwarmcoolwarm_rcoppercopper_rcubehelixcubehelix_r
flagflag_rgist_earthgist_earth_rgist_graygist_gray_r
gist_heatgist_heat_rgist_ncargist_ncar_rgist_rainbowgist_rainbow_r
gist_sterngist_stern_rgist_yarggist_yarg_rgnuplotgnuplot2
gnuplot2_rgnuplot_rgraygray_rhothot_r
hsvhsv_rinfernoinferno_rjetjet_r
magmamagma_rnipy_spectralnipy_spectral_roceanocean_r
pinkpink_rplasmaplasma_rprismprism_r
rainbowrainbow_rseismicseismic_rspringspring_r
summersummer_rtab10tab10_rtab20tab20_r
tab20btab20b_rtab20ctab20c_rterrainterrain_r
twilighttwilight_rtwilight_shiftedtwilight_shifted_rviridisviridis_r
winterwinter_r

获取颜色映射分类及名称

from collections import OrderedDict
in_cmaps = OrderedDict()
in_cmaps['Perceptually Uniform Sequential'] = [
            'viridis', 'plasma', 'inferno', 'magma', 'cividis']
in_cmaps['Sequential'] = [
            'Greys', 'Purples', 'Blues', 'Greens', 'Oranges', 'Reds',
            'YlOrBr', 'YlOrRd', 'OrRd', 'PuRd', 'RdPu', 'BuPu',
            'GnBu', 'PuBu', 'YlGnBu', 'PuBuGn', 'BuGn', 'YlGn']
in_cmaps['Sequential (2)'] = [
            'binary', 'gist_yarg', 'gist_gray', 'gray', 'bone', 'pink',
            'spring', 'summer', 'autumn', 'winter', 'cool', 'Wistia',
            'hot', 'afmhot', 'gist_heat', 'copper']
in_cmaps['Diverging'] = [
            'PiYG', 'PRGn', 'BrBG', 'PuOr', 'RdGy', 'RdBu',
            'RdYlBu', 'RdYlGn', 'Spectral', 'coolwarm', 'bwr', 'seismic']
in_cmaps['Cyclic'] = ['twilight', 'twilight_shifted', 'hsv']
in_cmaps['Qualitative'] = ['Pastel1', 'Pastel2', 'Paired', 'Accent',
                        'Dark2', 'Set1', 'Set2', 'Set3',
                        'tab10', 'tab20', 'tab20b', 'tab20c']
in_cmaps['Miscellaneous'] = [
            'flag', 'prism', 'ocean', 'gist_earth', 'terrain', 'gist_stern',
            'gnuplot', 'gnuplot2', 'CMRmap', 'cubehelix', 'brg',
            'gist_rainbow', 'rainbow', 'jet', 'nipy_spectral', 'gist_ncar']
print(len(in_cmaps.get('Perceptually Uniform Sequential')))
for k in in_cmaps:
    print(k+":  ", len(in_cmaps.get(k)))
Perceptually Uniform Sequential:   5
Sequential:   18
Sequential (2):   16
Diverging:   12
Cyclic:   3
Qualitative:   12
Miscellaneous:   16

将使用有名的 Iris Data Set(鸢尾属植物数据集)中的数据来演示图表的绘制和配置,这样更接近实际的应用。可以到QQ群:457079928中下载这个数据集iris.csv

Iris 数据集首次出现在著名的英国统计学家和生物学家Ronald Fisher 1936年的论文《The use of multiple measurements in taxonomic problems》中,被用来介绍线性判别式分析。

在这个数据集中,包括了三类不同的鸢尾属植物:Iris Setosa,Iris Versicolour,Iris Virginica。每类收集了50个样本,因此这个数据集一共包含了150个样本。

该数据集测量了 150 个样本的 4 个特征,分别是:

  1. sepal length(花萼长度)
  2. sepal width(花萼宽度)
  3. petal length(花瓣长度)
  4. petal width(花瓣宽度)

以上四个特征的单位都是厘米(cm)。

petal_l = iris_df['PetalLength'].values
sepal_l = iris_df['SepalLength'].values
norm = mpl.colors.Normalize(vmin=-2,vmax=10)
import matplotlib.pyplot as plt
from matplotlib.backends.backend_agg import FigureCanvasAgg
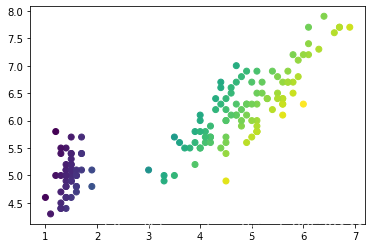
x = petal_l
y = sepal_l
fig = plt.figure()
ax= plt.axes()
color = x+y
plt.scatter(x, y, c=x/y)

在这里插入图片描述
连续的4篇博文基本涵盖了 matplotlib 配色的全部内容。

Matplotlib 配色之内置 colormap概述让图表看起来比较美观是图表配色最末的目的,配色最核心的目标是为你的数据集找到一个好的表达。对于任何给定的数据集,最佳的配色取决于许多因素,包括:表现形式或者度量数据。你对数据集的理解(如:是否有一个偏离其它值的临界值?)如果你正在绘制的参数(变量本身)有一个直观的配色方案如果在这个领域有一个标准(行业配色标准或习惯),读者可能会... 颜色映射,colormap 上一篇详细介绍了 matplotlib 直接使用"格式化的颜色定义"给图表元素配色。如,直接指定 axes.plot 绘制的 Line2D 的颜色 fmt = 'r'。 有时我们希望图表元素的颜色与数据集中某个变量的值相关,颜色随着该变量值的变化而变化,以反映数据变化趋势、数据的聚集、分析者对数据的理解等信息...
颜色图或调色板是指一系列的有规律的颜色的集合,可以区分不同类型的离散数据或不同值的连续数据。一般在matplotlib中称为colormap(在绘图函数中的关键字为cmap),在seaborn中一般称为color palette(在绘图函数中的关键字为palette)。由于seaborn是基于matplotlib开发的,因此matplotlib中的各类colormap一般seaborn均支持。 为统一起见,下文统称为palette或调色板。 调色板一般分为三类: 离散型(qualitative):用来表示
Excel中,颜色是通过界面展示及按钮选择确定的,在python代码环境下,自然是没有这种条件的,那么,matplotlib中颜色是如何构建与使用的呢? matplotlib提供了强大的颜色接口,供使用者定制颜色、使用颜色、使用色板,主要包括以下几个部分: 1、 matplotlib.colors 接口中定义的颜色空间,每一个颜色通过字典的形式进行保存,字典名为颜色名称,字典值为颜色对应的RGB元组或十六进制字符串。例如颜色名称可以为 darkred,字典值为 #8B0000。凡是颜色命名空间中定义了的颜色
0.前言添加colormap的对象是灰度图,可以变成热量图,从而更加明显的发现一些规律,适用于一些雷达图像等from PIL import Image # 将彩色图片转换成黑白图片 im=Image.open("./pic.jpg").convert('L') # 保存图片 im.save("image.jpg")1.从灰色图片中读取数据,转换成colormap图import matplotlib.
Matplotlib中,可以使用colormap来为图形的颜色标定提供更多的选择。而自定义条纹状colormap是一种特殊的colormap,它可以给图形的颜色添加条纹纹理。 要创建自定义条纹状colormap,需要使用hatch参数。Hatch参数可以设为一个包含各种条纹纹理的字符串。在Matplotlib中,可用的纹理包括斜线('/'、'\')、点('.')、加号('+')、减号('-')等等。可以通过改变这些字符的排列组合来制作出各种不同的条纹纹理。 为了实现自定义条纹状colormap,可以先创建一个包含纹理的字符串列表。然后,使用Colormap类中的from_list方法来创建自定义的colormap对象。在from_list方法中,需要指定colors参数为颜色列表,hatch参数为纹理列表。 以下是一个具体的实例代码: ```python import matplotlib.pyplot as plt import matplotlib.colors as colors # 自定义纹理列表 hatches = ['/', '\\', '|', '-', '+', 'x', 'o', 'O', '.', '*'] # 自定义颜色列表 colors_list = ['#ff0000', '#00ff00', '#0000ff'] # 创建自定义colormap对象 cmap = colors.ListedColormap(colors_list, hatch=hatches) # 创建一个简单的散点图 x = [1, 2, 3] y = [4, 5, 6] plt.scatter(x, y, c=[0, 1, 2], cmap=cmap, s=500) # 显示图形 plt.show() 在上述代码中,我们创建了一个包含三种颜色的自定义colormap,并使用scatter函数将三个点绘制在图形中。颜色和纹理分别对应每个点的值。绘制的图形中,每个颜色的区域都被对应的纹理填充,从而形成条纹纹理的效果。 通过以上方式,就可以实现自定义条纹状colormap。根据实际需求,可以改变颜色和纹理的组合,制作各种不同样式的条纹纹理图形。
Beautiful is better than ugly. Explicit is better than implicit. Simple is better than complex. Complex is better than complicated. Flat is better than nested. Sparse is better than dense. Readability counts. Special cases aren't special enough to break the rules. Although practicality beats purity. Errors should never pass silently. Unless explicitly silenced. In the face of ambiguity, refuse the temptation to guess. There should be one-- and preferably only one --obvious way to do it. Although that way may not be obvious at first unless you're Dutch. Now is better than never. Although never is often better than *right* now. If the implementation is hard to explain, it's a bad idea. If the implementation is easy to explain, it may be a good idea. Namespaces are one honking great idea -- let's do more of those!
matplotlib 绘图之坐标变换 qq_39694935: 答主写得很细致,感谢!